Advertisement
Quick Links
E11382
Revised Edition V2
February 2016
User Guide
E11382_C202SA_UM_V2_8pages.indd 1
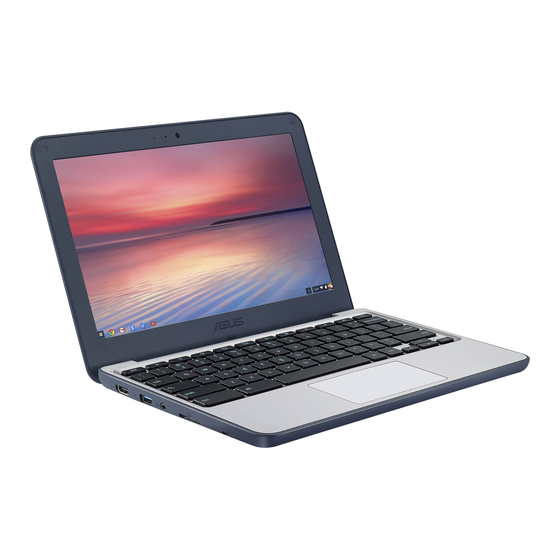
Top View
NOTE: The keyboard's layout may vary per region or country. The top view may also
vary in appearance depending on the Notebook PC model.
Microphone
Camera
Camera indicator
Display panel
Bluetooth/Wireless
indicator
Power button
Keyboard
Touchpad
I/O ports and slots
Audio speakers
Audio speakers
USB 3.0 port with BC 1.2
HDMI port
Power (DC) input port
USB 3.0 port with BC 1.2
Two-color battery charge indicator
Headphone/Headset jack
Power indicator
Memory card reader
Kensington® security slot
NOTE: Only one USB 3.0 port with BC 1.2 may quick-charge at a time.
Getting started
1. Charge your Notebook PC
A. Connect the AC power cord to the AC/DC adapter.
B. Plug the AC power cord into a 100V~240V power source.
C. Connect the DC power connector into your Notebook PC's power (DC) input port.
NOTE: The power adapter may vary in appearance, depending on models and your
region.
Charge the Notebook PC for 3 hours before
using it in battery mode for the first time.
2. Lift to open the display panel and your Notebook PC will turn on automatically
NOTE: You can also press the power button to turn your Notebook PC on or off.
Safety notices for your Notebook PC
WARNING!
The bottom of the Notebook PC can get warm to hot while in use or while charging the battery
pack. When working on your Notebook PC, do not place it on surfaces that can block the vents.
CAUTION!
• This Notebook PC should only be used in environments with ambient temperatures between
5°C (41°F) and 35°C (95°F).
• Refer to the rating label on the bottom of your Notebook PC and ensure that your power
adapter complies with this rating.
• The power adapter may become warm to hot while in use. Do not cover the adapter and keep
it away from your body while it is connected to a power source.
IMPORTANT!
• Ensure that your Notebook PC is connected to a grounded power adapter before turning it
on for the first time.
• When using your Notebook PC on power adapter mode, the socket outlet must be near to the
unit and easily accessible.
• Locate the input/output rating label on your Notebook PC and ensure that it matches the
input/output rating information on your power adapter. Some Notebook PC models may
have multiple rating output currents based on the available SKU.
• Power adapter information:
- Input voltage: 100-240Vac
- Input frequency: 50-60Hz
- Rating output current: 2.1A (40W)
- Rating output voltage: 19V
WARNING!
Read the following precautions for your Notebook PC's battery:
• Only ASUS-authorized technicians should
• Never attempt to short-circuit your
remove the battery inside the device
Notebook PC's battery.
(for non-removable battery only).
• Never attempt to disassemble and
• The battery used in this device may present
reassemble the battery
a risk of fire or chemical burn if removed or
(for non-removable battery only).
disassembled.
• Discontinue usage if leakage is found.
• Follow the warning labels for your personal
• This battery and its components must be
safety.
recycled or disposed of properly.
• Risk of explosion if battery is replaced by an
• Keep the battery and other small
incorrect type.
components away from children.
• Do not dispose of in fire.
2016/2/17
04:50:57
Advertisement

Summary of Contents for Asus C202SA
- Page 1 Keyboard - Rating output current: 2.1A (40W) C. Connect the DC power connector into your Notebook PC’s power (DC) input port. - Rating output voltage: 19V NOTE: The power adapter may vary in appearance, depending on models and your region. WARNING! Read the following precautions for your Notebook PC’s battery: • Only ASUS-authorized technicians should • Never attempt to short-circuit your Touchpad remove the battery inside the device Notebook PC’s battery. (for non-removable battery only). • Never attempt to disassemble and • The battery used in this device may present...
- Page 2 REACH website at http://csr.asus.com/english/REACH.htm. Regulation (EC) No. 1275/2008 Regulation (EC) No. 278/2009 ASUS will only be responsible for or indemnify you for loss, damages or claims based in contract, tort or Regulation (EC) No. 642/2009 Regulation (EU) No. 617/2013 • DO NOT use power adapters or batteries from other devices to reduce the risk of injury to infringement under this Warranty Statement.


