Sign In
Upload
Manuals
Brands
Canon Manuals
Printer Accessories
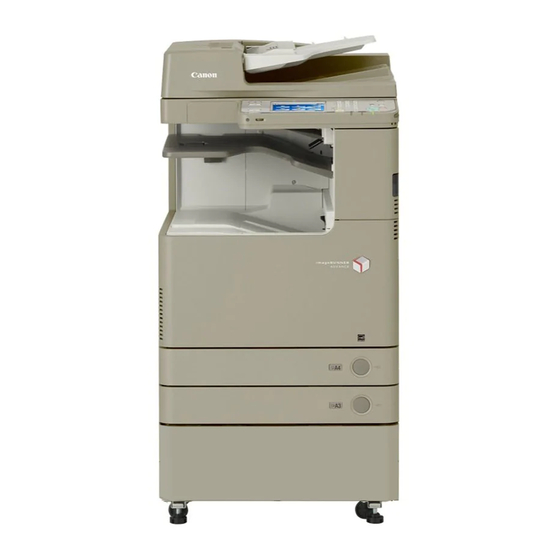
imageRUNNER ADVANCE C2020
Canon imageRUNNER ADVANCE C2020 Manuals
Manuals and User Guides for Canon imageRUNNER ADVANCE C2020. We have
8
Canon imageRUNNER ADVANCE C2020 manuals available for free PDF download: Service Manual, Service Handbook, User Manual, Setup Manual, Operating Manual, Manual
Canon imageRUNNER ADVANCE C2020 Service Manual (968 pages)
Brand:
Canon
| Category:
Printer
| Size: 46.35 MB
Table of Contents
Table of Contents
4
Safety Precautions
11
Laser Safety
12
Handling of Laser System
12
Turn Power Switch
13
Safety of Toner
13
About Toner
13
Toner on Clothing or Skin
13
Notes When Handling a Lithium Battery
13
Notes before It Works Serving
13
Points to Note at Cleaning
13
Features/Specifications
14
Product Lineup
14
Host Machine
15
Options
16
Features
18
Product Features
18
Service Features
18
Specifications
21
Weight and Size
22
Productivity (Print Speed)
22
Paper Type
22
Parts Name
24
External View
24
Cross Section View
25
Operation
26
Power Switch
26
Control Panel
27
Service Mode
29
Process/Operation
35
Basic Configuration
35
Functional Configuration
36
Basic Sequence
37
Main Controller
40
Overview
40
Controls
48
Security
50
Service Tasks
65
Laser Exposure System
66
Overview
66
Various Controls
69
Servicing
75
Overview
76
Controls
79
Service Tasks
108
Fixing System
109
Overview
109
Controls
111
Service Tasks
119
Pickup Feed System
120
Overview
120
Various Controls
125
Service Tasks
137
External Auxiliary System
138
Controls
138
Power Supply Control
141
Service Tasks
145
Meap
146
Changes
146
Checking the Operating Environment
146
Setting up the Network
149
Login to SMS
150
Setting the Method to Login to SMS
153
Checking MEAP Application Management Page
156
Starting and Stopping a MEAP Application
157
Checking the Platform Information
158
MEAP Specifications
158
MEAP Application System Information
160
Installing an Application
162
Adding a License File
164
Disabling a License File
166
Downloading / Removing an Invalidated License File
167
Reusable License
169
License for Forwarding
169
Uninstalling an Application
171
Login Service
172
Changing Login Services
177
Initializing the Password
178
Backup of the MEAP Application Area and Recovery of the Backup Data Using SST
179
Formatting and Replacing the Hdd/Flash PCB
184
MEAP Safe Mode (Level 2)
186
Collection of MEAP Console Logs
188
Setting HTTP Port for MEAP Application (Level 2)
193
Using USB Devices
196
Reference Material
201
Option for Exclusive Individual Measure
203
Embedded RDS
205
Product Overview
205
Limitations
206
Service Cautions
207
E-RDS Setup
207
Faq
218
Troubleshooting
219
Error Code and Strings
223
Updater
225
Functional Overview
225
Limitations and Cautions
229
Preparation
230
System Management Operations
236
Maintenance
241
Faq
242
Consumable Parts and Cleaning Parts
245
Cleaning Parts
248
Parts Replacement and Cleaning
249
List of Parts
249
List of Cover
250
List of Main Unit
253
Conector
278
Disassembly/Assembly- Main Controller System
286
Removing the Controller Cover
286
Removing the Main Controller PCB 1
287
Removing the Main Controller 2
287
Removing the DC Controller PCB
288
Removing the Controller Box
289
Disassembly/Assembly - Laser Control System
292
Cleaning the Dustproof Glass
292
Removing the Laser Scanner Unit
293
Removing the Main Drive Unit
295
Disassembly/Assembly - Image Formation System
301
Removing the Waste Toner Container
301
Removing the Drum Unit
301
Removing the ITB Unit
303
Installing the ITB Unit
304
Removing the Front Cover
305
Removing the Toner Bottle Mount
306
Removing the Toner Bottle Mount
310
Removing the Hopper Unit
313
Removing the Hopper Unit
315
Removing the Waste Toner Feed Assembly
316
Removing the Registration Patch Sensor
317
Disassembly/Assembly - Fixing System
319
Removing the Fixing Assembly
319
Removing the Fixing Gear Assembly
321
Disassembly/Assembly - Pickup Feed System
325
Opening the Right Lower Cover Fully
325
Cleaning the Pre-Registration Guide
325
Cleaning the Registration Roller
326
Cleaning the Pre-Secondary Transfer Outer Guide
326
Cleaning Duplex Feed Lower Roller
327
Removing the Cassette 1 Separation Roller Unit
327
Removing the Cassette 1 Pickup Roller
329
Removing the Cassette 1 Pickup Unit
330
Removing the Cassette 2 Pickup Unit
332
Removing the Cassette 2 Pickup Roller
333
Removing the Cassette 2 Feed Roller
334
Removing the Cassette 2 Separation Roller
334
Removing the Pickup Assembly Idler Gear
335
Removing the Multi-Purpose Tray Pickup Roller
335
Removing the Multi-Purpose Tray Separation Pad
337
Removing the Secondary Transfer Outer Roller
338
Removing the Right Door Unit
339
Disassembly/Assembly - External Auxiliary System
342
Removing the Low-Voltage Power Supply Unit
342
Adjustment
343
Main Controller
343
Hdd
344
Main Controller PCB 1
344
Main Controller PCB 2
345
DC Controller PCB
345
Pickup Feed System
346
Method of Setting Special Paper
346
Method of Setting 8K and 16K (Chinese Paper)
346
Troubleshooting
347
Initial Check
347
Initial Check Items List
348
Test Print
349
Overview
349
Steps to Select the Test Print TYPE
349
How to Use the Test Print
350
Troubleshooting Items
356
Troubleshooting Items List
356
Image Failure
356
Operation Failure
365
Version Upgrade
370
Overview
370
Version Upgrade Via SST
372
Version Upgrade Using USB Memory Storage Device
386
Version Upgrade Via CDS
399
Startup System Failure Diagnosis
430
The Viewpoint of this Startup System Failure Diagnosis
430
Startup Failure Analysis Policy
431
Flow A: Execution Flow for Control Panel Startup Failure
433
Flow B: Control Panel 12V Check Flow
436
Flow C: Main Controller Analysis Flow
439
Flow D: Low-Voltage Power Supply (3.3V) System Flow
441
Flow E: Low-Voltage Power Supply (12V) System Flow
446
Flow F: Connector Disconnection Flow
452
Reference: Activation Conditions of the Control Panel Backlight
453
Flow G: Execution Flow of Startup System Failure Diagnosis
454
Procedure A: Detailed Procedure of Startup System Failure Diagnosis
455
Controller Self Diagnosis
456
Introduction
456
Overview
456
Basic Flowchart
459
Operation
460
Debug Log
463
Scope of Application
463
Overview
463
Storing System Information
464
Collecting System Information
466
Collecting Debug Log (USB Memory Device)
466
DBG-LOG Screen
468
Log2Usb
468
Log2Srvr
469
Log-Trig
470
Hit-Sts
471
Hit-Sts2
471
Default
471
Syslog
471
Log-Del
471
An Example of Automatic Log Collection Setting
471
Uploading Data by SST
473
Error Code Overview
475
Outline
476
Error Code
478
Error Code Details
478
Jam Code
545
Jam Screen Display Specification
545
Color Image Reader Unit-D1/D2
547
Inner Finisher-C1
548
Alarm Code
549
Service Mode
553
Overview
553
Points to Note When Using Service Mode
554
Service Mode Menu
554
Service Mode Item Explanations
555
I/O Information Enhancement
555
Display of Error Code/Alarm Code Description
556
Security Features
557
Switching Screen (Level 1 < - > 2)
558
Language Switch
558
Back-Up of Service Mode
559
Copier
560
Display
560
Adjust
597
Function
644
Test
719
Counter
722
Feeder
730
Display
730
Adjust
730
Function
730
Sorter
733
Adjust
733
Function
733
Installation
736
How to Check this Installation Procedure
736
Installation Procedure
736
Installing the Toner Container
744
Scanner Installation
745
Setting the Environment Heater Switch
745
Turning on the Power
745
Turning off the Main Power
745
Installing the Others
746
Securing the Host Machine
746
Setting the Cassette
747
Auto Gradation Adjustment
748
Image Position Adjustment
748
Margin Adjustment (2Nd Side)
750
Installing Others
753
Affixing the Label
753
Checking the Network Connection
754
Network Troubleshooting
755
Printer Model (for Europe) Installation Procedure
757
Points to Note at Installation
757
Checking the Contents
757
Installing the Printer Cover-D2
761
Expansion Bus-F2/ Ipsec Board-B2/ Wireless LAN Board-B2
767
Points to Note at Installation
767
Checking the Contents [Expansion Bus-F2]
767
Checking the Contents [Ipsec Board-B2]
768
Checking the Contents [Wireless LAN Board-B2]
768
Check Items When Turning off the Main Power
769
Installation Outline Drawing
769
Installation Procedure
770
Inner 2Way Tray-F1
778
Points to Note at Installation
778
Checking the Contents
778
Check Items When Turning off the Main Power
778
Installation Outline Drawing
778
Installation Procedure
779
Checking after Installation
781
Copy Tray-J1
782
Points to Note at Installation
782
Checking the Contents
782
Check Items When Turning off the Main Power
782
Installation Procedure
783
Copy Card Reader-F1
784
Points to Note at Installation
784
Checking the Contents
784
Check Items When Turning off the Main Power
785
Installation Outline Drawing
785
Installation Procedure
785
Checking after Installation
790
Reader Heater Unit-H1 Installation Procedure
791
Checking the Contents
791
Points to Note before Installation
791
Installation Procedure
792
Utility Tray-A2
794
Points to Note at Installation
794
Installation Outline Drawing
794
Checking the Contents
794
Installation Procedure
795
When Installing the USB Keyboard
797
Stamp Unit-B1
798
Points to Note at Installation
798
Checking the Contents
798
Installation Outline Drawing
799
Operation Check
801
Voice Operation Kit-C2
802
Pre-Check
802
Points to Note When Installing
802
Checking the Contents
802
Check Items When Turning off the Main Power
803
Installation Outline Drawing
803
Installation Procedure
803
Checking after Installation
809
Operation Check
809
Multimedia Reader/Writer-A2/A3
810
Points to Note at Installation
810
Checking the Contents
810
Check Items When Turning off the Main Power
810
Installation Outline Drawing
810
Installation Procedure
811
Operation Check
815
Voice Guidance Kit-F2
819
Pre-Check
819
Points to Note When Installing
819
Checking the Contents
819
Check Items When Turning off the Main Power
820
Installation Outline Drawing
820
Installation Procedure
820
Checking the Settings
826
Operation Check
826
Cassette Heater Unit
827
Check Items When Turning off the Main Power
828
Installation Outline Drawing
828
Installation Procedure
828
When Relocating the Machine
835
Combination of HDD Options
836
How to Check this Installation Procedure
836
Description on the Parts Included in the Package
836
When Using the Parts Included in the Package
836
Symbols in the Illustration
836
Points to Note Regarding Data Backup/Export
837
Making a Backup of the Data (Reference Only)
838
Type1:2.5Inch/80Gb HDD-E11 Installation Procedure
842
Points to Note before Installation
842
Checking the Contents [2.5Inch/80Gb HDD-E1]
842
Check Items When Turning off the Main Power
843
Installation Outline Drawing
843
Installation Procedure
844
Setting after Installation
849
Checking after Installation
849
Type2:2.5Inch/80Gb HDD-E1/HDD Data Encryption Kit-C3 Installation Procedure
850
Points to Note at Installation
850
Points to Note When Unpacking HDD Data Encryption
850
Mirroring Kit
850
Checking the Contents [2.5Inch/80Gb HDD-E1]
851
Checking the Contents [HDD Data Encryption Kit-C3]
852
Check Items When Turning off the Main Power
852
Installation Outline Drawing
852
Installation Procedure
853
Setting after Installation
860
Checking after Installation
860
After Installing the Encryption Kit
860
Type3:Removable HDD Kit-AE1 Installation Procedure
861
Points to Note at Installation
861
Checking the Contents [Removable HDD Kit-AE1]
861
Check Items When Turning off the Main Power
862
Installation Outline Drawing
862
Installation Procedure
862
Checking after Installation
867
Type4:Removable HDD Kit-AE1 Installation Procedure
868
Points to Note at Installation
868
Checking the Contents [Removable HDD Kit-AE1]
868
Check Items When Turning off the Main Power
869
Installation Outline Drawing
869
Installation Procedure
869
Checking after Installation
875
Type5:Removable HDD Kit-AE1/HDD Data Encryption Kit-C3 Installation Procedure
876
Points to Note at Installation
876
Points to Note When Unpacking HDD Data Encryption
876
Mirroring Kit
876
Checking the Contents [Removable HDD Kit-AE1]
877
Checking the Contents [HDD Data Encryption Kit-C3]
877
Check Items When Turning off the Main Power
878
Installation Outline Drawing
878
Installation Procedure
878
Setting after Installation/After Installing the Encryption Kit
886
Checking after Installation
886
Type6:2.5Inch/80Gb HDD-E1/Removable HDD Kit-AE1 Installation Procedure
887
Points to Note at Installation
887
Checking the Contents [2.5Inch/80Gb HDD-E1]
887
Checking the Contents [Removable HDD Kit-AE1]
888
Check Items When Turning off the Main Power
889
Installation Outline Drawing
889
Installation Procedure
889
Setting after Installation
897
Checking after Installation
897
Type7
898
Inch/80Gb HDD-E1/Removable HDD Kit-AE1/ HDD Data Encryption Kit-C3 Installation Procedure
898
Points to Note at Installation
898
Points to Note When Unpacking HDD Data Encryption
898
Mirroring Kit
898
Checking the Contents [2.5Inch/80Gb HDD-E1]
899
Checking the Contents [Removable HDD Kit-AE1]
900
Checking the Contents [HDD Data Encryption Kit-C3]
900
Check Items When Turning off the Main Power
901
Installation Outline Drawing
901
Installation Procedure
901
Setting after Installation
911
Checking after Installation
911
Appendix
912
Service Tools
912
Special Tools
913
Solvents and Oils
914
General Timing Chart
915
General Circuit Diagram Signal Input/Output List
917
General Circuit Diagram
920
General Circuit Diagram(1/14)
920
General Circuit Diagram(2/14)
921
General Circuit Diagram(3/14)
922
General Circuit Diagram(4/14)
923
General Circuit Diagram(5/14)
924
General Circuit Diagram(6/14)
925
General Circuit Diagram(7/14)
926
General Circuit Diagram(8/14)
927
General Circuit Diagram(9/14)
928
General Circuit Diagram(10/14)
929
General Circuit Diagram(11/14)
930
General Circuit Diagram(12/14)
931
General Circuit Diagram(13/14)
932
General Circuit Diagram(14/14)
933
List of User Mode
934
Preferences
934
Adjustment/Maintenance
944
Function Settings
945
Set Destination
955
Management Settings
956
Backup Data
961
Detail of HDD Partition
963
Soft Counter Specifications
964
Advertisement
Canon imageRUNNER ADVANCE C2020 Service Handbook (292 pages)
Color image RUNNER
Brand:
Canon
| Category:
Printer
| Size: 1.73 MB
Table of Contents
Table of Contents
5
Chapter 1 Maintenance and Inspection
13
Periodically Replaced Parts
13
Consumables and Durables
13
Chapter 2 Standards and Adjustments
17
Adjusting the Image Position
17
Standards
17
Checking the Image Position
17
Making Scanner-Related Adjustments
18
Routing the Scanner Drive Cable
18
Adjusting the Intensity of the Scanning Lamp
19
After Replacing the Scanning Lamp
20
Mounting Back the Existing Scanning Lamp
20
Keeping the Reader Unit Level
21
After Replacing the Standard White Plate
22
Adjusting Other Electrical Parts
23
When Replacing the CCD Unit
23
Pcb
24
When Replacing the ECO
25
Replacing the DIMM
28
Removing the DIMM from the Reader Controller PCB
29
Mounting the DIMM on the Reader Controller PCB
30
Downloading
31
Making Preparations
31
Downloading Procedure
31
Appendix
45
General Timing Chart
47
Signals and Abbreviations
49
Signals
49
Abbreviations
50
Special Tools
50
Solvents and Oils
50
Reader Unit General Timing Diagram
51
Chapter 1 Maintenance and Inspection
55
Periodically Replaced Parts
55
Consumables and Durables
56
Printer Unit
56
Chapter 2 Standards and Adjustments
61
Adjusting the Image Position
61
Standards for Image Position
61
Checking the Position of the Image
62
Adjusting the Left/Right Image Margin
63
Adjusting the Leading Edge Margin
67
Adjusting the Left/Right Non-Image Width
67
Leading Edge Non-Image Width
67
Image Formation System-Related Adjustments
68
Points to Note When Handling the Drum Unit
68
After Replacing the Drum Unit
68
After Replacing the Transfer Belt
69
Pickup/Feed System-Related Adjustments
70
Attaching the Timing Belt
70
For the Manual Feed Tray
71
Executing Paper Width Reference Point Auto Adjustment for the Manual Feed Tray
71
Adjusting the Paper Width Basic Value for the Manual Feed Tray
71
Fixing System-Related Adjustments
72
When Replacing the Web
72
Adjusting the Nip
73
Removing the Skew
75
When Replacing the Fixing Roller
76
LED Exposure Unit-Related Adjustments
77
Points to Note When Handling the LED Exposure Unit
77
Points to Note When Mounting the LED Exposure Unit
78
After Replacing the LED Exposure Unit
78
Claening the LED Exposure Unit
78
Adjusting Other Electric Parts
79
When Replacing the System Controller PCB
79
When Replacing the DC Controller PCB
80
Checking the Environment Measurement PCB
82
Checking the Photointerrupters
84
Upgrading
88
Replacing the DIMM
88
Removing the DIMM
89
Mounting the DIMM of the System Controller PCB and the DC Controller PCB
92
Chapter 3 Arrangement and Functions of Electrical Parts
97
Sensors
98
Thermistor, Lamps, and Heaters
101
Clutches and Solenoids
104
Fans
106
Motors
108
Pcbs
110
Cassette Pedestal
112
Variable Resistors (VR), Light-Emitting Diodes, and Check Pins by PCB
114
Controller PCB
115
System Controller PCB
116
Pickup Assembly PCB
118
Duplex Driver PCB (Duplex Model Only)
119
Cassette Pedestal
131
Printer Unit General Circuit Diagram
133
Cassette Pedestal General Circuit Diagram
135
Special Tools
137
Solvents and Oils
139
Outline
143
Construction of Service Mode
143
Starting the Service Mode
145
Ending the Service Mode
146
Backing up the Service Mode
146
Basic Operation
147
Initial Screen
147
Level 1/Level 2 Screen
147
Level 3 Screen
148
DISPLAY (Status Indication Mode
149
Copier/Printer
149
Feeder
168
Editor
168
O (I/O Display Mode
169
DC-Con
170
R-Con
176
S-Con
178
Feeder
180
Copier
182
Adjustment Mode (ADJUST
192
Copier/Printer
192
Feeder
218
Operation/Inspection Mode (FUNCTION
219
Copier/Printer
219
Feeder>Function
234
OPTION (Settings Mode
235
Copier/Printer
235
Feeder
250
Sorter
250
TEST (Test Print Mode
251
COUNTER (Counter Mode
255
Self Diagnosis (Copier
265
Self Diagnosis O (DADF
277
Self Diagnosis (Finisher
280
Finisher Assembly
280
Saddle Stitcher
283
Self Diagnosis (Sorter
287
Self Diagnosis (PDL Board
289
Canon imageRUNNER ADVANCE C2020 User Manual (276 pages)
Brand:
Canon
| Category:
Printer Accessories
| Size: 8.85 MB
Table of Contents
Table of Contents
5
Preface
10
How to Use this Manual
11
Symbols Used in this Manual
11
Displays Used in this Manual
13
Trademarks
15
1 Before You Start Using this Product
17
Product
17
Chapter 1 Before You Start Using this
18
Overview of the Voice Navigation Mode
18
Control Panel
22
Parts and Their Functions
22
Parts and Their Functions
28
Control Panel
29
Speaker
30
Earphones/Headphones
32
Reversing the Contrast of the Touch Panel Display
34
Moving the Focus
37
Main Power and Control Panel Power
39
How to Turn on the Main Power
39
Shutting down the Machine
46
Starting and Stopping the Voice Navigation Mode
48
Starting the Voice Navigation Mode
48
Stopping the Voice Navigation Mode
51
2 Making Copies in the Voice Navigation Mode
53
Navigation Mode
53
Basic Copying Features
55
Before Making Copies
55
Flow of Copy Operations
61
Specifying the Required Number of Copies
68
Chapter 2 Making Copies in the Voice
70
Basic Copying Features
70
Canceling a Copy Job
71
Placing Originals
72
Placing Originals
74
Feeder
74
Orientation
74
Platen Glass
74
Feeder
82
Basic Copy Settings
89
Paper Selection
89
Manual Exposure Adjustment
93
Original Type Selection
98
Changing Color Modes
102
Preset Zoom
109
Setting the Copy Ratio
109
Zoom by Percentage
114
Auto Zoom
117
Collating Copies
120
Collating Copies into Sets in Page Order
122
Grouping Copies of the same Page Together
127
Collating Pages and Stapling
131
2-Sided Copying
136
Making 2-Sided Copies from 1-Sided Originals
137
Making 2-Sided Copies from 2-Sided Originals
141
Making 1-Sided Copies from 2-Sided Originals
146
Making 2-Sided Copies from Facing Pages in a Book
149
Canceling a Copy Mode
154
In the Voice Navigation Mode
157
Functions that Are Supported by the Voice
158
Navigation Mode
158
Basic Send/Fax Features
158
Chapter 3 Using the Send and Fax Functions
159
Before Sending/Faxing a Document
159
Flow of Sending Operations
161
Canceling a Job
174
Sending Fax Document Manually
176
Sending Fax Document Manually
182
Specifying Registered Destinations
185
Using the Favorites Settings
186
Confirming the Destination List
190
Confirming the Destination List
192
Scan Settings
193
Resolution
194
Scan Size
198
Density
204
Original Type
209
2-Sided Originals
214
Different Size Originals
218
Changing the Zoom Ratio
223
Auto Zoom
233
4 Customizing Settings
237
Chapter 4 Customizing Settings
238
Enabling/Disabling the Voice Navigation Mode
238
Setting the Maximum Volume of the Voice Guidance
241
Setting the Auto Reset Mode
244
Voice Type Settings
248
Voice Type Settings
250
Volume and Voice Speed Settings
251
Enabling/Disabling the Voice Guide from Speaker
257
Chapter 5 Appendix
261
Copy Mode Summary
262
Send/Fax Mode Summary
274
Advertisement
Canon imageRUNNER ADVANCE C2020 Setup Manual (68 pages)
Color Multifunction Copier
Brand:
Canon
| Category:
All in One Printer
| Size: 20.63 MB
Table of Contents
How this Manual Is Organized
2
Operations Required to Use the Machine
2
Preface
3
Symbols Used in this Manual
3
Keys and Buttons Used in this Manual
3
Flow of Settings for Using the Desired Functions
4
Table of Contents
6
Chapter 1 Operations Required to Use the Machine
9
Logging in to the Machine as an Administrator
10
Logging in from the Touch Panel Display
10
Logging in Using the Remote UI
10
Connecting the Machine to a Network
12
Setting a Network on the Machine
14
Managing the Machine from a Computer
17
Settings Required to Use the Remote
17
Managing the Machine Using the Remote
18
Settings Required to Use SMS
19
Managing the Machine Using SMS
20
Chapter 2 Setting up the Machine for the First Time
21
Using E-Mail/I-Fax
22
Settings Required to Send E-Mail/I-Faxes
22
Specifying E-Mail/I-Fax Settings
22
Sending E-Mail/I-Faxes
23
Storing New Destinations
23
Sending an E-Mail Message
25
Sending Scanned Data to a File Server
26
Settings Required to Send Data to a Computer
26
Setting a Computer
26
Scanning and Sending an Original to the Shared Folder of a Computer
30
Storing New Destinations
30
Sending Scanned Data to a Shared Folder
31
Sending Faxes
32
Settings Required to Send Faxes
32
Registering the Fax Number, Unit Name, and Line Type
32
Attaching the Sender's Name to Sent Documents
34
Sending Faxes
35
Storing New Destinations
35
Sending a Fax
37
Sending/Receiving Faxes Via the Remote Fax Server
37
Settings Required to Send Faxes Via the Remote Fax Server
37
Setting the Server
37
Setting the Client
38
Sending Faxes Using the Remote Fax Server
39
Settings Required to Receive a Fax Via the Remote Fax Server
39
Setting the Client
39
Setting the Server
39
Sending Faxes from a Computer Using the Machine
40
Settings Required to Send Faxes from a Computer
40
Installing the Fax Driver
40
Sending Faxes from a Computer
41
Printing a Document from a Computer
42
Settings Required to Print from a Computer
42
Installing the Printer Driver
42
Printing from a Computer
43
Scanning an Original
44
Settings Required to Perform Scanning
44
Installing the Scanner Driver
44
Setting Remote Scanning Online
44
Scanning an Original
46
Using an Advanced Box on the Network
47
Settings Required to Use an Advanced Box on the Network
47
Accessing an Advanced Box on the Network
48
Making an Advanced Box Accessible on the Network
48
Storing Data in an Advanced Box on the Network
50
Chapter 3 Using the System Options/Meap Applications
53
Installing the System Options/Meap Applications
54
Installing by Connecting this Machine to an Outside Network
54
Installing by Not Connecting this Machine to an Outside Network
54
License Registration
55
System Options/Meap Applications
55
Installing the System Options/Meap Applications
55
Installing by Connecting this Machine to an Outside Network
55
Installing by Not Connecting this Machine to an Outside Network
55
Installing by Connecting this Machine to an Outside Network
56
Installing by Not Connecting this Machine to an Outside Network
56
Using the Touch Panel Display to Install (Delivery)
56
Using the Remote UI to Install (Delivery)
58
Installing by Not Connecting this Machine to an Outside Network
59
Obtaining the License Key/License File
59
Installing the System Options Using the Touch Panel Display
59
Installing the System Options Using the Remote UI (Manual)
59
Installing the MEAP Applications Using the Remote UI (Manual)
60
Starting the MEAP Applications
61
Downloading the Manuals and Related Software
62
Managing by Using the Touch Panel Display
62
Displaying the Installation Log Using the Touch Panel Display
62
Testing Communication Using the Touch Panel Display
63
Managing by Using the Remote UI
64
Displaying the Installation Log Using the Remote UI
64
Testing Communication Using the Remote UI
64
Updating the Firmware
65
Updating Firmware
65
Updating Using the Remote UI (Manual)
66
Canon imageRUNNER ADVANCE C2020 Operating Manual (49 pages)
Brand:
Canon
| Category:
All in One Printer
| Size: 4.14 MB
Table of Contents
Manuals for the Machine
2
Setup Guide
2
Basic Operation Guide
2
How to Use this Manual
3
Symbols Used in this Manual
3
Keys and Buttons Used in this Manual
3
Illustrations Used in this Manual
4
Abbreviations Used in this Manual
4
Operations and Terms Used in this Manual
7
Legal Notices
8
Product Name
8
Laser Safety
8
International ENERGY STAR Program
9
Ipv6 Ready Logo
9
Third Party Software
9
The Software Subjected to Other Conditions
10
Legal Limitations on the Usage of Your Product and the Use of Images
10
Users in the U.S.A
11
Users in Canada
12
Utilisation Au Canada
13
Important Safety Instructions
15
Installation
15
Power Supply
16
Maintenance and Inspections
19
Telephone Equipment
21
Other Warnings
21
Installation Location and Handling
22
Installation Precautions
22
Avoid Installing the Machine in the Following Locations
22
Select a Safe Power Supply
23
Moving the Machine
24
Provide Adequate Installation Space
24
Handling Precautions
25
Backing Up/Exporting Data
26
Parts and Their Functions
27
External View
27
Internal View
28
Control Panel Parts and Functions
30
Main Power and Control Panel Power
31
How to Turn on the Main Power
31
Control Panel Power Switch
32
Shutting down the Machine
33
Specifications
34
Main Unit
34
Cassette Feeding Unit-AF1
36
Envelope Feeder Attachment-D1
36
Inner Finisher-C1
37
Inner Finisher Additional Tray-A1
38
Inner 2 Way Tray-F1
39
Copy Tray-J1
39
Card Reader-C1
40
Super G3 FAX Board
40
Send Function
41
Network Environment
42
Printer Settings
42
TERMS of Imageware REMOTE SERVICE
44
TERMS of Content Delivery System
45
Canon imageRUNNER ADVANCE C2020 Service Manual (24 pages)
Brand:
Canon
| Category:
All in One Printer
| Size: 1.78 MB
Table of Contents
Service Manual
1
Table of Contents
3
Functional Overview
5
Outline of Network (Advanced Box/Space Client)
6
Network
6
Note
6
File Format
8
Note
8
Lineup
9
Usa
9
Asia
9
Aus
9
China
10
The Differences from Ir-ADV C5051 Series
11
Copy
11
Pdl
11
Send
11
Memory Media
12
Advanced Box/Space Client
12
Network
12
Security
12
Web Access
13
Specifications
14
Specifications Regarding Advanced Box/ Space (Server Machine)
15
User Authentication (User Access Control for Adavanced Box/Space)
15
Specifications Regarding Energy-Saving, Sleep and Auto-Sleep
16
Exclusive Control of Documents in Operation
17
Specifications Regarding Smb/Webdav
17
Specifications When Iw SAM Function Is Enabled
17
Specifications in Dept. ID Management
18
Specifications Regarding Link to Memory Media
19
Installation/Settings
20
Save to Network (External Connection Setting)
21
Settings for Server
21
Open to Public
21
SMB Authentication Settings
21
Allow to Create Personal Space
22
Authentication Management
22
Disabling Writing from External Device/Pc
23
Settings for Client
24
Protocol Settings
24
Network Settings
24
Canon imageRUNNER ADVANCE C2020 Manual (14 pages)
Brand:
Canon
| Category:
Copier
| Size: 6.77 MB
Table of Contents
Checking the Contents
2
Installation Outline Drawing
2
Check Item When Turning off the Main Power
2
Installation Procedure
3
Setting the Cassette
8
Checking the Print Image
12
Image Position Adjustment
13
Canon imageRUNNER ADVANCE C2020 Manual (12 pages)
Brand:
Canon
| Category:
All in One Printer
| Size: 2.24 MB
Advertisement
Related Products
Canon imageRUNNER ADVANCE C2030
Canon imageRUNNER ADVANCE C7055
Canon imageRUNNER ADVANCE C7065
Canon imagePRESS C6000VP
Canon imagePRESS C6000
Canon imageRUNNER ADVANCE C9065 PRO
Canon imageRUNNER ADVANCE C9075 PRO
Canon imageRUNNER ADVANCE 6065
Canon imageRUNNER ADVANCE 6075
Canon imageRUNNER ADVANCE 6055
Canon Categories
Printer
Digital Camera
All in One Printer
Camcorder
Scanner
More Canon Manuals
Login
Sign In
OR
Sign in with Facebook
Sign in with Google
Upload manual
Upload from disk
Upload from URL