Sign In
Upload
Manuals
Brands
HP Manuals
Storage
BL536A
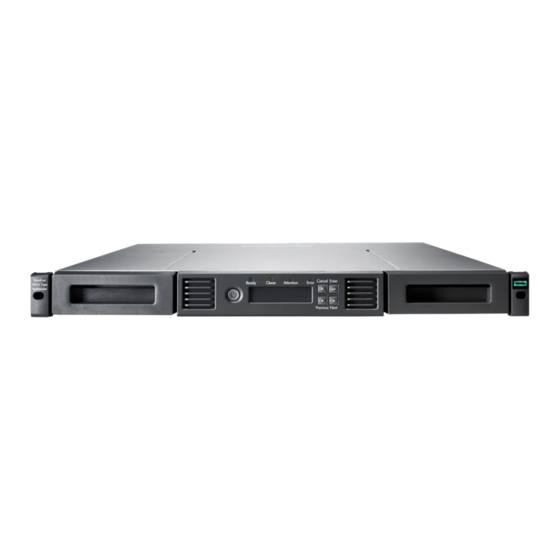
User Manuals: HP BL536A Tape Autoloader
Manuals and User Guides for HP BL536A Tape Autoloader. We have
1
HP BL536A Tape Autoloader manual available for free PDF download: User's & Service Manual
HP BL536A User's & Service Manual (165 pages)
StorageWorks 1/8 G2 Tape Autoloader
Brand:
HP
| Category:
Storage
| Size: 5.56 MB
Table of Contents
Table of Contents
3
1 Features and Overview
8
Autoloader Options
9
HP Storageworks 1/8 G2 & MSL Encryption Kit
9
Command View TL Tapeassure
9
Interface Specifications and Requirements for Parallel SCSI Drives
10
Parallel SCSI Host Bus Adapters (Hbas)
10
Multiple LUN Support
10
Interface Specifications and Requirements for Fibre Channel Drives
11
Interface Specifications and Requirements for SAS Drives
11
LTO-4 and Later Generation Tape Drives and Encryption
12
Using the Encryption Kit
12
Using Application-Managed Encryption
13
Front Panel Overview
13
Back Panel Overview
14
Tape Drive LED
15
Controller Health Status Indicator
16
2 Installing the Tape Autoloader
17
Preparing the Host
17
Planning the Parallel SCSI Configuration
18
About Parallel SCSI Busses
18
Optimizing Throughput
18
SCSI Addresses
18
Planning the SAS Configuration
19
About SAS
19
SAS Cables and Connectors
19
World Wide Identifiers
20
Planning the Fibre Channel Configuration
20
Direct Connection
20
SAN Connection
20
Choosing a Location
20
Unpacking the Shipping Container
21
Identifying Product Components
21
Attaching the Feet
22
Removing the Shipping Lock
23
Mounting the Device in a Rack
24
Installing the Tabletop Conversion Kit
25
Changing the SCSI Address (Parallel SCSI Drives Only)
25
Connecting the Parallel SCSI Cable (Parallel SCSI Devices Only)
26
Connecting the Fibre Channel Cables (Fibre Channel Devices Only)
27
Connecting the SAS Cable (SAS Devices Only)
27
Powering on the Device
27
Configuring the Device
28
Verifying the Connection
28
Labeling and Loading the Tape Cartridges
28
Verifying the Installation
29
Configuring Additional Features
29
3 Tape Cartridges and Magazines
30
Tape Cartridges
30
Using and Maintaining Tape Cartridges
31
Labeling Tape Cartridges
31
Write-Protecting Tape Cartridges
32
Read and Write Compatibility
33
Magazines
33
4 Operating the Tape Autoloader
35
Remote Management Interface (RMI)
35
Overview
35
Login
36
Status Pane
37
Getting Help
38
Identity
38
Viewing Static Device Information
38
Viewing Static Drive Information
39
Viewing Network Information
41
Status
42
Viewing Dynamic Device Information
42
Viewing Dynamic Drive Information
43
Viewing the Tape Cartridge Inventory
45
Configuration
46
Changing the System Configuration
46
Changing the Drive Configuration
49
Changing the Network Configuration
50
Configuration: Network Management
52
Configuring HP Systems Insight Manager for the Tape Autoloader
54
Changing the Administrator Password
54
Setting the Date and Time
55
Setting Error Log Mode
56
Setting Event Notification Parameters
56
Saving and Restoring the Device Configuration and Restoring Factory Defaults
57
Operations
58
Moving Media
58
Updating the Current Media Inventory
59
Releasing and Replacing the Magazines
59
Support
60
Performing General Diagnostics
60
HP Service - Service Restricted
60
Determining and Updating Firmware
61
Rebooting the Device
61
Viewing Logs
61
Cleaning the Tape Drive
62
Downloading a Support Ticket
62
Operator Control Panel (OCP)
64
LED Indicators
65
Autoloader Home Screen
65
Operator Control Panel Buttons
66
Understanding the Menu Structure
67
Entering the Administrator Password
68
Unlocking the Mailslot (Unlock Mailslot)
69
Status/Information
69
Inventory (Status/Information > Inventory)
69
Autoloader Information (Status/Information > Autoloader Information)
70
Drive Information (Status/Information > Drive Information)
71
Component Status (Status/Information > Component Status)
71
Network Information (Status/Information > Network Information)
71
Configuration
72
Changing the Administrator Password (Configuration > Change Admin Password)
72
Setting the Number of Reserved Slots (Configuration > Set Reserved Slot Count)
73
Configuring the Mailslot (Configuration > Configure Mailslot)
73
Bar Code Reporting Format (Configuration > Barcode Format Reporting)
73
Changing the SCSI Address - Parallel SCSI Devices (Configuration > Change Drive)
74
Setting Behaviors (Configuration > Autoloader Behavior)
74
Setting the Date and Time (Configuration > Autoloader Date/Time)
75
Configuring Network Settings (Configuration > Configure Network Settings)
75
Configuring Automatic Cleaning (Configuration > Configure Auto Cleaning)
76
Restoring Factory Defaults (Configuration > Restore Defaults)
77
Saving and Restoring the Autoloader Configuration (Configuration > Save/Restore Configuration)
77
Operations
78
Unlocking, Removing, and Replacing Magazines (Operations > Unlock Left or Right Magazine)
78
Cleaning the Tape Drive (Operations> Clean Drive)
79
Moving Tapes in the Autoloader (Operations > Move Tape)
80
Updating Tape Cartridge Inventory (Operations > Perform Inventory)
80
Rebooting the Autoloader (Operations> Reboot Autoloader)
81
Enabling Password Locks (Operations > Enable Autoldr Password Locks)
81
Support
81
Powering a Drive on or off (Support > Power On/Off Drive)
81
Running the Demonstration (Support > Run Demo)
82
Running the Slot to Slot Test (Support > Run Slot to Slot Test)
82
Running the Wellness Test (Support > Run Wellness Test)
82
Upgrading Firmware (Support > Autoloader FW Upgrade, Support > Drive FW Upgrade)
83
Viewing Logs (Support > Autoloader Error Log)
84
Downloading a Support Ticket (Support > Download Support Ticket)
84
Forcing the Drive to Eject a Tape (Support > Force Drive to Eject Tape)
85
5 Troubleshooting
86
Detection Problems after Installing a Parallel SCSI Device
86
Detection Problems after Installing a SAS Device
88
Fibre Channel Connection Problems
89
Operation Problems
90
Performance Problems
95
Average File Size
96
File System Type
96
Connection from the Host Server to the Disks
97
Operating System Configuration
100
Windows
100
Novell
101
Backup Server
101
Backup Type
101
File-By-File with a Full-Featured Backup Application
102
File-By-File with a Native Application
102
Disk Image, Flash, or Sequential
102
Database Backup
102
Connection from the Host Server to the Autoloader
102
Media
103
Service and Repair
104
Releasing the Magazines Manually
104
The Wellness Test
104
Error Codes
105
Finding Error Code Information on the OCP
106
Finding Error Code Information on the RMI
106
Finding Error Code Information on an L&TT Support Ticket or Report
107
Main Error Code Descriptions
110
Error Sub-Code Descriptions
119
Drive Error Codes
122
Warning Events
123
Configuration Change Events
126
Information Events
127
Using HP Library & Tape Tools to Diagnose Problems
128
6 Upgrading and Servicing the Tape Autoloader
130
Possible Tools Needed
130
Removing and Replacing a Tape Drive
131
Removing and Replacing a Magazine
133
Using the Operator Control Panel
133
Using the Remote Management Interface
133
Using the Manual Magazine Release
134
Removing and Replacing the Base Chassis
134
Recording Configuration Settings
135
Removing the Tape Cartridge from the Tape Drive
135
Removing the Cables, Magazines, and Tape Drive
135
Removing the Base Chassis
136
Unpacking the New Chassis
136
Replacing the Base Chassis
137
7 Support and Other Resources
139
HP Technical Support
139
HP Websites
139
Typographic Conventions
139
Customer Self Repair
140
Subscription Service
140
HP-Authorized Reseller
141
A Technical Specifications
142
Physical Specifications
142
Environmental Specifications
142
Regulatory Specifications
142
B Regulatory Compliance and Safety
144
Regulatory Compliance Identification Numbers
144
Federal Communications Commission Notice
144
FCC Rating Label
144
Class a Equipment
144
Class B Equipment
144
Declaration of Conformity for Products Marked with the FCC Logo, United States Only
145
Modification
145
Cables
145
Canadian Notice (Avis Canadien)
145
Class a Equipment
145
Class B Equipment
145
European Union Regulatory Notice
145
Japanese Notices
146
Japanese VCCI-A Notice
146
Japanese VCCI-B Notice
146
Japanese Power Cord Statement
146
Korean Notices
146
Class a Equipment
146
Class B Equipment
147
Taiwanese Notices
147
BSMI Class a Notice
147
Taiwan Battery Recycle Statement
147
Laser Compliance Notices
148
English Laser Notice
148
Dutch Laser Notice
148
French Laser Notice
148
German Laser Notice
149
Italian Laser Notice
149
Japanese Laser Notice
149
Spanish Laser Notice
150
Recycling Notices
150
English Notice
150
Bulgarian Notice
150
Czech Notice
150
Danish Notice
151
Dutch Notice
151
Estonian Notice
151
Finnish Notice
151
French Notice
151
German Notice
152
Greek Notice
152
Hungarian Notice
152
Italian Notice
152
Latvian Notice
152
Lithuanian Notice
153
Polish Notice
153
Portuguese Notice
153
Romanian Notice
153
Slovak Notice
153
Spanish Notice
154
Swedish Notice
154
Turkish Notice
154
Battery Replacement Notices
154
Dutch Battery Notice
154
French Battery Notice
155
German Battery Notice
155
Italian Battery Notice
156
Japanese Battery Notice
156
Spanish Battery Notice
157
Power Cords
157
C Electrostatic Discharge
158
Preventing Electrostatic Damage
158
Grounding Methods
158
Glossary
159
Index
162
Advertisement
Advertisement
Related Products
HP BladeSystem c-Class c3000
HP BladeSystem c-Class ProLiant Series
HP StoreOnce B6000
HP StoreOnce B6200
HP BRSLA-0902-AC
HP BRSLA-0703-AC
HP BRSLA-0704-AC
HP BRSLA-0705-AC
HP BRSLA-0605-AC
HP BRSLA-0904-AC
HP Categories
Desktop
Laptop
Server
Monitor
Switch
More HP Manuals
Login
Sign In
OR
Sign in with Facebook
Sign in with Google
Upload manual
Upload from disk
Upload from URL