Sign In
Upload
Manuals
Brands
Huawei Manuals
Accessories
V200R010
Huawei V200R010 Manuals
Manuals and User Guides for Huawei V200R010. We have
2
Huawei V200R010 manuals available for free PDF download: Hardware Description, User Manual
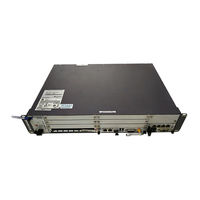
Huawei V200R010 Hardware Description (104 pages)
Brand:
Huawei
| Category:
Control Unit
| Size: 2.03 MB
Table of Contents
About this Document
5
Table of Contents
9
1 Changes in the BBU3900 Hardware Description
17
2 DBS3900 Monitoring System
21
Customized Alarm Input
22
Table 2-1 Configurations of Monitoring Boards in the DBS3900
22
Figure 2-1 Customized Alarms Collected by the UPEU or UEIU
23
Table 2-2 Relationship between the IN0 to IN3 Ports on the USLP2 and the Number of Customized Alarms
23
BBU Monitoring Port
24
Figure 2-2 Customized Alarms Collected by the EMUA (1)
24
Figure 2-3 Customized Alarms Collected by the EMUA (2)
24
Monitoring Principles of the Cabinets
25
Figure 2-4 Slot Assignment for the UPEU and UEIU
25
Figure 3-1 BBU3900
25
Table 2-3 Ports on the UPEU and UEIU
25
Figure 2-5 Monitoring Principles of the DBS3900 When the BBU Is Installed in the APM30
26
Figure 2-6 Monitoring Principles of the DBS3900 When the BBU Is Installed in the APM30H (Ver.a)
27
Figure 2-7 Monitoring Principles of the DBS3900 When the BBU Is Installed in the APM30H (Ver.b)
27
Figure 2-8 Monitoring Principles of the DBS3900 When the BBU Is Installed in the APM30H (Ver.b)
28
Figure 2-9 Monitoring Principles of the DBS3900 When the RRU Is Powered and Monitored by the APM30H
28
Figure 2-10 Monitoring Principles of the DBS3900 When the BBU Is Installed in the OMB
28
Figure 2-11 Monitoring Principles of the DBS3900 in the BBU+RRU+ICR (110V/220V) Scenario
29
Figure 2-12 Monitoring Principles of the DBS3900 in the BBU+RRU+IMB03 (110V/220V) Scenario
29
Figure 2-13 Monitoring Principles of the DBS3900 When the BBU Is Installed in the TMC or TMC11H
29
Figure 2-14 Monitoring Principles of the DBS3900 When the BBU Is Installed in the OMB
30
Figure 2-15 Monitoring Principles of the DBS3900 When the BBU Is Installed in the APM30H (Ver.b) in the +24
30
Figure 2-16 Monitoring Principles of the DBS3900 in the BBU+RRU+ICR (+24 V DC) Scenario
30
3 BBU3900 Equipment
31
Exterior of the BBU3900
32
BBU3900 Components
32
Figure 3-2 the Position of the ESN
32
Board Configuration of the BBU3900
33
Figure 3-3 Slots of the BBU3900
33
Table 3-1 Board Configuration of the BBU3900
34
Figure 3-4 BBU3900 in Typical Configuration
35
Wmpt
35
Figure 3-5 Panel of the WMPT
36
Table 3-2 Leds on the WMPT
36
Figure 3-6 Leds Besides the Three Ports on the WMPT
37
Table 3-3 Leds Beside the Three Ports
37
Table 3-4 Ports on the WMPT
38
Figure 3-7 DIP Switches on the WMPT
39
Table 3-5 Settings of SW1
39
Table 3-6 Settings of SW1
39
Figure 3-10 Panel of the Wbbpd
40
Figure 3-8 Panel of the Wbbpa
40
Figure 3-9 Panel of the Wbbpb
40
Wbbp
40
Table 3-7 Specifications of the WBBP
41
Table 3-8 Leds on the WBBP and Their Status
41
Table 3-10 Ports on the Panels of the Wbbpa and Wbbpb
42
Table 3-9 Leds Indicating the Status of the SFP Links
42
Fan
43
Figure 3-11 Panel of the FAN Unit
43
Table 3-11 Ports on the Wbbpd
43
Figure 3-12 Panel of the UPEUA
44
Table 3-12 LED on the FAN Unit and Its Status
44
Upeu
44
Figure 3-13 Panel of the UPEUB
45
Figure 3-14 Slots in the BBU
45
Table 3-13 LED on the UPEU and Its Status
45
Figure 3-15 Panel of the UEIU
46
Table 3-14 Ports on the Panel of the UPEU
46
Ueiu
46
Table 3-15 Ports on the Panel of the UEIU
47
Table 3-16 Specifications of the UTRP
47
Utrp
47
Figure 3-16 Panel of the UTRP2 Supporting Two Optical Ports
48
Figure 3-17 Panel of the UTRP3 and UTRP4 Supporting Eight E1S/T1S
48
Figure 3-18 Panel of the UTRP6 Supporting One STM-1
48
Figure 3-19 Panel of the UTRP Supporting Four Electrical Ports
48
Table 3-17 Leds on the Panel of the UTRP
49
Table 3-18 Leds on the Ethernet Ports of the UTRP2 and UTRP9
50
Table 3-19 Ports of the UTRP2 Supporting Two Optical Ports
50
Figure 3-20 DIP Switch on the UTRP3 or UTRP4
51
Table 3-20 Ports on the Panel of the UTRP3 and UTRP4 Supporting Eight E1S/T1S
51
Table 3-21 Port of the UTRP6 Supporting One STM-1
51
Table 3-22 Ports of the UTRP9 Supporting Four Electrical Ports
51
Table 3-23 DIP Switch SW1 on the UTRP
52
Table 3-24 DIP Switch SW2 on the UTRP
52
Table 3-25 DIP Switch SW3 on the UTRP
52
Figure 3-21 Panel of the Uscub1 (0.5 U)
53
Figure 3-22 Panel of the Uscub2 (1 U)
53
Uscu
53
Table 3-26 Leds on the USCU
54
Table 3-27 Leds on the TOD Port
55
Table 3-28 Ports on the USCU
55
4 BBU3900 Cables
57
List of BBU3900 Cables
59
Table 4-1 List of BBU3900 Cables
59
PGND Cable
61
BBU Power Cable
61
Figure 4-1 PGND Cable
61
Figure 4-2 BBU Power Cable (1)
62
Figure 4-3 BBU Power Cable (2)
62
Table 4-2 Pin Assignment for the Wires of the -48 V Power Cable
62
BBU Power Cable(OMB)
63
Figure 4-4 Appearance of Power Cable(AC OMB)
63
Table 4-3 Pin Assignment for the Wires of the +24 V Power Cable
63
E1/T1 Cable
64
Figure 4-5 Appearance of Power Cable(DC OMB)
64
Figure 4-6 E1/T1 Cable
64
Table 4-4 Connectors of the 75-Ohm E1 Coaxial Cable
64
Table 4-5 Pin Assignment for the Wires of the 75-Ohm E1 Coaxial Cable
65
E1/T1 Surge Protection Transfer Cable
66
Table 4-6 Pin Assignment for the Wires of the 120-Ohm E1 Twisted Pair Cable
66
Figure 4-7 E1/T1 Surge Protection Transfer Cable
67
Table 4-7 Pin Assignment for the Wires of the E1/T1 Surge Protection Transfer Cable
67
FE/GE Cable
68
Figure 4-8 FE/GE Cable
68
Table 4-8 Pin Assignment for the Wires of the FE/GE Cable
68
FE/GE Surge Protection Transfer Cable
69
FE/GE Optical Cable
69
Figure 4-9 FE/GE Surge Protection Transfer Cable
69
Table 4-9 Pin Assignment for the Wires of the FE/GE Surge Protection Transfer Cable
69
CPRI Optical Cable
70
Figure 4-10 FE/GE Optical Cable (FC and LC Connectors)
70
Figure 4-11 FE/GE Optical Cable (SC and LC Connectors)
70
Figure 4-12 FE/GE Optical Cable (LC and LC Connectors)
70
Figure 4-13 Multi-Mode Optical Cable
71
Figure 4-14 the Connections of the Multi-Mode CPRI Optical Fiber
71
Figure 4-15 Single-Mode Optical Cable
72
Figure 4-16 the Connections of the Single-Mode CPRI Optical Fiber
72
Monitoring Signal Cable between the APMI and the BBU
73
Table 4-10 Labels and Recommended Connections for the Branch Cables of the Multi-Mode Optical Cable between
73
Table 4-11 Labels and Recommended Connections for the Branch Cables of the Multi-Mode Optical Cable between
73
Table 4-12 Labels and Recommended Connections for the Branch Cables of the Single-Mode Optical Cable and
73
Monitoring Signal Cable for the Transmission Cabinet
74
Figure 4-17 Monitoring Signal Cable between the APMI and the BBU
74
Monitoring Signal Cable between the HEUA and the BBU
75
Figure 4-18 Monitoring Signal Cable for the Transmission Cabinet
75
Table 4-14 Connections of the Monitoring Signal Cable for the Transmission Cabinet
75
EMUA Monitoring Signal Cable
76
Figure 4-19 Monitoring Signal Cable between the HEUA and the BBU
76
Monitoring Signal Cable between the CMUA and the BBU
77
Figure 4-20 EMUA Monitoring Signal Cable
77
Table 4-16 Pin Assignment for the Wires of the EMUA Monitoring Signal Cable
77
BBU Alarm Cable
78
Figure 4-21 Monitoring Signal Cable between the CMUA and the BBU
78
Table 4-17 Pin Assignment for the Wires of the Monitoring Signal Cable between the CMUA and the BBU
78
Figure 4-22 BBU Alarm Cable
79
Table 4-18 Pin Assignment for the Wires of the BBU Alarm Cable
79
GPS Clock Signal Cable
80
Figure 4-23 GPS Clock Signal Cable
80
5 Auxiliary Devices of the BBU3900
81
Emua
83
Indoor Centralized Rack
83
Figure 5-1 10 U Indoor Centralized Rack
83
Omb
84
Table 5-1 Specifications for the 10 U Indoor Centralized Rack
84
Figure 5-2 OMB Cabinet
85
Table 5-2 Dimensions of the OMB Cabinet
85
Imb03
86
Figure 5-3 IMB03
86
Figure 5-4 DC IMB03
87
Figure 5-5 AC IMB03
88
Table 5-3 Specifications of the IMB03
88
Dcdu-03
89
Figure 5-6 DCDU-03
89
Table 5-4 DC Power Distribution Functions of the DCDU-03
89
Figure 5-7 Ports on the Panel of the DCDU-03
90
AC/DC Power Equipment
91
Figure 5-8 AC/DC Power Equipment
91
Table 5-5 Ports on the Panel of the DCDU-03
91
Table 5-6 Panel of the AC/DC Power Equipment
92
Table 5-7 Leds on the Panel of the Rectifier
92
Table 5-8 Leds on the Panel of the Monitoring Module
93
Figure 5-9 DIP Switches on the PMU
94
Table 5-9 Settings of the DIP Switches on the PMU
94
Wgru
95
Figure 5-10 Exterior of the WGRU
95
Figure 5-11 WGRU Installed in the WGRU Box
96
Figure 5-12 Front Panel of the WGRU
96
Figure 5-13 Rear Panel of the WGRU Box
97
Table 5-10 Indicators on the Front Panel of the WGRU
97
Slpu
98
Table 5-11 Ports on the Front Panel of the WGRU
98
Table 5-12 Ports on the Rear Panel of the WGRU
98
Configuration of the SLPU
99
Exterior of SLPU
99
Figure 5-14 SLPU
99
Figure 5-15 Slots of the SLPU
99
Figure 5-16 UELP Panel
100
Uelp
100
Figure 5-17 DIP Switch on the UELP
101
Table 5-15 Ports of the UELP
101
Figure 5-18 Panel of the UFLP
102
Table 5-16 DIP Switch on the UELP
102
Table 5-17 Ports on the Panel of the UFLP
102
Uflp
102
Figure 5-19 Panel of the USLP2
103
Figure 5-20 Mapping Relationship between the Pins in the Input and Output Ports on the USLP2
103
Table 5-18 Ports on the Panel of the USLP2
103
Uslp2
103
Table 5-19 Mapping Relationship between the Pins in the Input and Output Ports on the USLP2
104
Advertisement
Huawei V200R010 User Manual (46 pages)
Brand:
Huawei
| Category:
Accessories
| Size: 1.01 MB
Table of Contents
Table of Contents
3
About this Document
9
1 Changes in the RRU3804 User Guide
13
2 DBS3900 Hardware Configuration
15
Typical Configurations of the DBS3900
16
Table 2-1 Typical Configurations of the DBS3900
16
Figure 2-1 Cable Connections of the DBS3900 in Type 3 X 1 Configuration
17
4-Way RX Diversity Configuration
18
Figure 2-2 Cable Connections of the DBS3900 in Type 3 X 4 Configuration
18
Table 2-2 Number of Modules in the DBS3900 in 4-Way RX Diversity Configuration
19
TX Diversity Configuration
20
Figure 2-3 Cable Connections of the DBS3900 in 4-Way RX Diversity Configuration
20
Table 2-3 Number of Modules in the DBS3900 in TX Diversity Configuration
21
X 2 MIMO Configuration
22
Figure 2-4 Cable Connections of the DBS3900 in TX Diversity Configuration
22
Table 2-4 Number of Modules in the DBS3900 in 2 X 2 MIMO Configuration
23
Figure 2-5 Cable Connections of the DBS3900 in 2 X 2 MIMO Configuration
24
3 RRU Hardware
25
RRU Equipment
26
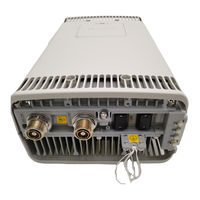
Appearance of the RRU3804
26
Figure 3-1 Appearance of the RRU3804
26
Panels of the RRU3804
27
Figure 3-2 Panels of the RRU3804
27
Leds on the RRU3804
28
Table 3-1 Ports and Leds on the Panels of the RRU3804
28
Table 3-2 Leds on the RRU3804
28
RRU Cables
29
RRU3804 Cable List
30
Table 3-3 RRU3804 Cable List
30
PGND Cable of the RRU
31
Figure 3-3 PGND Cable
31
Power Cable of the RRU
32
Figure 3-4 2-Hole Terminal
32
Figure 3-5 -48 V DC Power Cable
32
Table 3-4 Pin Assignment for the Wires of the -48 V DC Power Cable (North American Standard)
32
CPRI Optical Cable
33
Figure 3-6 CPRI Optical Cable
33
Table 3-5 Pin Assignment for the Wires of the -48 V DC Power Cable (European Standard)
33
AISG Multi-Wire Cable of the RRU
34
Figure 3-7 AISG Multi-Wire Cable
34
Table 3-7 Pin Assignment for the Fiber Tails of the CPRI Optical Cable between Rrus
34
AISG Extension Cable of the RRU
35
Figure 3-8 AISG Extension Cable
35
Table 3-8 Pin Assignment for the Wires of the AISG Multi-Wire Cable
35
RF Jumper of the RRU
36
Figure 3-9 Antenna Jumper
36
Table 3-9 Pin Assignment for the Wires of the AISG Extension Cable
36
Figure 3-10 Interconnect Jumper
37
Table 3-10 RF Jumper Connections of the RRU
37
Alarm Cable of the RRU
38
Figure 3-11 Alarm Cable
39
Table 3-11 Pin Assignment for the Wires of the Alarm Cable
39
4 Maintaining the Hardware of the RRU
41
Maintenance Items of the RRU
42
Powering on and Powering off the RRU
42
Powering on the RRU
42
Table 4-1 Maintenance Items of the RRU
42
Powering off the RRU
43
Replacing the RRU
44
Replacing an Optical Module
45
Figure 4-1 Removing an RRU
45
Advertisement
Related Products
Huawei V200R011
Huawei V100R009
Huawei V100R010
Huawei V100R008C01
Huawei V300R008
Huawei V200R012
Huawei V200R011C00
Huawei V200R013C00
Huawei V200R001
Huawei 3900 Series
Huawei Categories
Cell Phone
Network Router
Wireless Router
Modem
Inverter
More Huawei Manuals
Login
Sign In
OR
Sign in with Facebook
Sign in with Google
Upload manual
Upload from disk
Upload from URL