Sign In
Upload
Manuals
Brands
Sanyo Manuals
Air Conditioner
KHS3672R
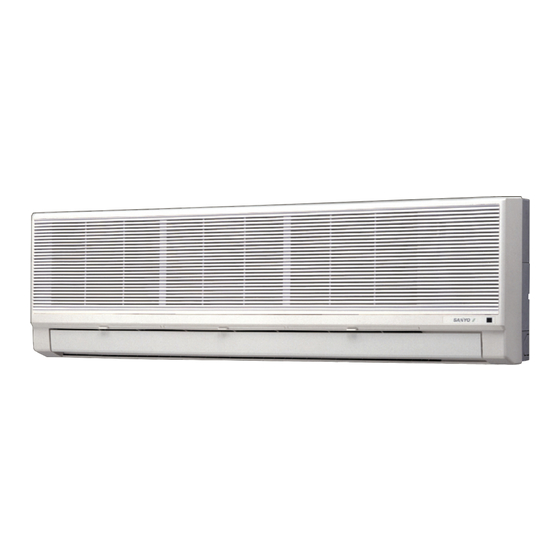
Sanyo KHS3672R Manuals
Manuals and User Guides for Sanyo KHS3672R. We have
3
Sanyo KHS3672R manuals available for free PDF download: Installation Instructions Manual, Datasheet
Sanyo KHS3672R Installation Instructions Manual (111 pages)
Sanyo Split System Heat Pump Air Conditioner Installation Instructions
Brand:
Sanyo
| Category:
Air Conditioner
| Size: 9.31 MB
Table of Contents
Installation Instructions
1
Important
2
Please Read before Starting
2
Check of Density Limit
3
Precautions for Installation Using New Refrigerant
4
Table of Contents
6
Check of Density Limit
6
Please Read before Starting
6
1 General
8
Tools Required for Installation (Not Supplied)
8
Accessories Supplied with Outdoor Unit
8
Type of Copper Tube and Insulation Material
8
Additional Materials Required for Installation
8
Tubing Size
13
2 Selecting the Installation Site
16
Indoor Unit
16
Outdoor Unit
17
Air-Discharge Chamber for Top Discharge
18
Installing the Unit in Heavy Snow Areas
18
Precautions for Installation in Heavy Snow Areas
18
Dimensions of Wind Ducting
19
Dimensions of Snow Ducting
22
3 How to Install the Indoor Unit
26
4 Way Air Discharge Semi-Concealed Type
26
(X Type)
26
Suspending the Indoor Unit
26
Preparation for Suspending
26
Placing the Unit Inside the Ceiling
27
Installing the Drain Piping
28
Checking the Drainage
29
Before Installing the Ceiling Panel
30
Installing the Ceiling Panel
31
When Removing the Ceiling Panel for Servicing
31
Duct for Fresh Air
32
I Wall-Mounted Type (K Type)
34
Removing the Wall Fixture from the Unit
34
Selecting and Making a Hole
34
Installing the Rear Panel on the Wall
37
Removing the Grille to Install the Indoor Unit
39
Preparing the Indoor Side Tubing
41
Wiring Instructions
42
Wiring Instructions for Inter-Unit Connections
43
Shaping the Tubing
46
Installing the Drain Hose
46
I Ceiling-Mounted Type (T Type)
47
Suspending the Indoor Unit
47
Duct for Fresh Air
50
Installing the Drain Piping
50
I Concealed-Duct Type (U Type)
51
Required Minimum Space for Installation and Service
51
Suspending the Indoor Unit
52
Installing the Drain Piping
53
Checking the Drainage
54
Increasing the Fan Speed
55
How to Install the Outdoor Unit
56
Installing the Outdoor Unit
56
Drainage Work
56
Routing the Tubing and Wiring
56
5 Electrical Wiring
57
General Precautions on Wiring
57
Recommended Wire Length and Wire Diameter for Power Supply System
57
Wiring System Diagrams
58
How to Connect Wiring to the Terminal
59
6 How to Install the Wired Remote Controller (Optional Part)
60
Installation Site Selection
60
Wired Remote Controller Installation
61
Basic Wiring Diagram
62
Wiring System Diagram for Group Control
63
Wiring System Diagram for Multiple Remote Controllers
64
How to Switch the Indoor Temperature Sensor
64
Trouble Diagnostics
65
7 How to Install the Wireless Remote Controller (Accessory Part / Optional Part)
68
Wireless Remote Controller Installation
68
Room Temperature Sensor Setting
69
Address Switches
69
Setting the Model Code
69
Rcs-Sh80Ua.wl
70
4-Way Air Discharge Semi-Concealed Type
70
(X Type)
70
Indicator Section Installation
70
Operating Controller Installation
70
I Ceiling-Mounted Type (T Type)
71
Indicator Section Installation
71
Operating Controller Installation
71
Electrical Wiring
72
Test Run Switch
72
Misoperation Alarm Indicators
73
Rcs-Bh80Ua.wl
74
Separate Type Signal Receiving Unit Installation
74
Electrical Wiring
76
Test Run Switch
76
Misoperation Alarm Indicators
77
Basic Wiring Diagram
80
Wiring System Diagram for Multiple Remote Controllers
80
Rcs-Sh1Ua
81
Test Run Procedure
81
Check Items before the Test Run
81
Preparing for the Test Run
82
Precautions
83
When Setting Indoor Unit Control PCB Switch for Wall-Mounted Indoor Unit
84
8 How to Install the System Controller (Optional Part)
85
System Controller Installation
85
Electrical Wiring
86
Address Switch Setting
87
Mode Setting
89
How to Perform Zone Registration
90
Connection with Other Equipment
96
Memory Backup Switch
96
Test Run
96
9 How to Process Tubing
97
Connecting Tubing between Indoor and Outdoor Units
98
Insulating the Refrigerant Tubing
99
Taping the Tubes
100
Finishing the Installation
100
10 Leak Test, Evacuation and Additional Refrigerant Charge
101
Leak Test
101
Evacuation
102
Charging Additional Refrigerant
103
Finishing the Job
103
11 Test Run
104
Preparing for Test Run
104
Caution
105
Test Run Procedure
105
Items to Check before the Test Run
106
Test Run Using the Remote Controller
106
Precautions
106
Examples of Wiring Diagrams
108
Advertisement
Sanyo KHS3672R Datasheet (2 pages)
Wall Mounted Heat Pump
Brand:
Sanyo
| Category:
Air Conditioner
| Size: 0.7 MB
Sanyo KHS3672R Datasheet (2 pages)
Wall Mounted Air Conditioner
Brand:
Sanyo
| Category:
Air Conditioner
| Size: 0.65 MB
Advertisement
Advertisement
Related Products
Sanyo KHS3632
Sanyo KHS3072R
Sanyo COOL/DRY/HEAT KHS3082
Sanyo COOL/DRY/HEAT KHS3682
Sanyo KHS3082 + CH3082
Sanyo KHS3682 + CH3682
Sanyo KHS0922
Sanyo KHS1852-S
Sanyo KHS2432
Sanyo KHS1872
Sanyo Categories
Projector
TV
Air Conditioner
Security Camera
LCD TV
More Sanyo Manuals
Login
Sign In
OR
Sign in with Facebook
Sign in with Google
Upload manual
Upload from disk
Upload from URL