Sign In
Upload
Manuals
Brands
Sony Manuals
VCR
Betacam SP BVW-50P
Sony Betacam SP BVW-50P Manuals
Manuals and User Guides for Sony Betacam SP BVW-50P. We have
1
Sony Betacam SP BVW-50P manual available for free PDF download: User Manual
Sony Betacam SP BVW-50P User Manual (119 pages)
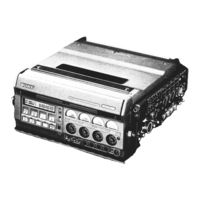
Sony Betacam SP Portable Recorder/Player
Brand:
Sony
| Category:
VCR
| Size: 4.38 MB
Table of Contents
Table of Contents
2
Intended Readers
5
Introduction
10
Overview
11
Features
12
Improved Video Characteristics
12
Four-Channel Audio Recording
12
High-Speed Picture Search Function
13
Accurate Continuous Recording
13
Dolby NR System
13
Distinguishing the Cassette Tape Type
13
Designed for Field Operation
14
Low Power Consumption
14
L-Size Videocassette Loading
14
Button Deactivation Feature
14
Connecting of Other Equipment
15
Earphones and Headphones
15
Phantom Microphone
15
Optional Accessories
15
System Configurations
16
System Configuration for Field Editing
16
Precautions
17
Handling the VTR
17
Power Supply
17
Use and Storage Locations
17
Location and Function of Parts and Controls
18
Front Panel
19
Operation Functions
20
Rec Button/Lamp
20
E-E Mode
20
Adjustment Functions
22
Level Meters
22
Level Indication Button
23
Audio Recording Level Controls
23
Power Switch
23
Light Selector
23
Display Functions
24
Display Window
24
Warning Indications
25
Operation Status Indications
25
BATT Indication
25
TAPE Indication
25
Time Data Indication
26
RESET Button
26
Display Selector
26
Warning Lamp
26
Time Code Panel
27
Running Mode Selector
28
ADVANCE Button
28
SHIFT Button
29
Real Time Recording
29
REAL Time Insertion
29
Connector Panel
30
Audio Functions
31
Afm Input Ch
31
CONFI Selector
31
DOLBY NR Switch
32
AUDIO DUB Selector
32
PHONE LEVEL Control
32
Audio Input Signal Selectors
32
Earphone Jack
33
Headphones Jack
33
Video Functions
34
Color Frame Switch
35
Video Level Control
35
TC out Connector
35
Power Source Functions
38
Power Source Functions on the Connector Panel
38
RFU out Connectors
38
REMOTE Connector
38
DC out Connector
39
DC in 12V Connector
39
BREAKER Button
39
MODE Selector
39
Time Base Corrector Adjustment Panel
40
Getting Started
41
Supplying Power
42
Installing a Battery Pack
42
Installing a BP-90A Battery Pack
42
How Long the Battery Lasts
42
How to Install a Battery Pack
43
Installing Two NP-1B Battery Packs
45
Connecting an AC Power Adaptor
46
Loading and Unloading a Cassette Tape
47
Usable Cassette Tapes
47
Preventing Accidental Erasure of Recording
48
Loading a Cassette Tape
49
Checking the Tape Slack
50
Unloading a Cassette Tape
51
If the Battery Is Exhausted While the Tape Is in the VTR
51
Using the VTR in a Dark or Bright Place
52
Using in a Dark Place
52
Using in a Bright Place
52
Recording
53
Getting Ready to Record
54
Connecting the Required Equipment
54
Setting the Time Data
55
Setting the Time Code
55
Accessing the Time Code Panel
55
Drop Frame Mode
56
Non-Drop Frame Mode
56
Setting the User's Bits
57
Setting the Real Time in the User's Bits
58
User's Bit Indication in the Display Window
58
Recording the VITC and User's Bits
59
Checking the Real Time
59
Checking the VITC Value
60
Locking the Internal Time Code to an External Generator
61
Connecting the Equipment
61
To Start Locking the Internal Time Code
62
How the Built-In Generator Functions after It Is Locked
62
To Lock the User's Bits to External User's Bits
62
Locking an External Time Code to the Built-In Generator
63
Selecting the Video Input Signal
64
Adjusting the Video Input Level
65
Selecting the Audio Input Signal
66
Selecting the Recording Method
67
Recording with AFM Recording
67
Recording with Dolby NR System
68
Adjusting the Audio Input Level
69
Monitoring the Signal You Are Recording
70
Checking the VTR before Recording
71
Checking the Battrey Remaining
71
Checking the Tape Remaining
72
Tape Remaining Indication
72
Tape Remaining Warnings
72
Recording Operations
73
Avoiding Misoperation
73
Recording Procedure
74
To Pause Recording
75
Playback
76
Getting Ready to Play Back
77
Selecting and Adjusting the Monitor Audio Signal
78
Selecting the Audio Signal for Monitoring
78
Adjusting the Audio Monitor Level
79
Selecting the Monitor Audio Signal
79
Monitoring the Playback Picture on TV
80
Connecting the Required Equipment for Monitoring on TV
80
Playback the Signal on TV
81
Transmitting the Playback Signal Using a Field Pickup Unit
82
Connecting FPU
82
Playback Operations
83
To Pause Playback
83
Searching a Particular Scene
84
To Play Back the Picture at Faster Speed
85
Reading and Dispalying the Time Code/User's Bits
86
Displaying the Time Code/User's Bits
86
Superimposing the Time Code/User's Bits
87
Audio Dubbing
88
Setting the Switches
90
Audio Dubbing Operations
91
Editing
93
Overview of Editing
94
Setting up the Editing System Without the Editing Control Unit
95
Supplying the Signal
97
Supplying the Video Signal
97
Supplying the Reference Signal
97
Troubleshooting
99
When the Warning Indication Appears
99
How to Remove a Cassette Tape if the Battery Is Exhausted
102
Cleaning the Heads
103
Specifications
104
Putting the VTR into the Carrying Case
105
Video
106
Audio
107
Input Connectors
108
Output Connectors
108
Remote Control Connector
110
Special Functions
110
Supplied Accessories
110
Recommended Equipment
110
Glossary
111
Ltc
112
Radio Frequency Unit
112
Time Base Corrector
112
Time Code
112
Vertical Interval Time Code
113
Index
114
Advertisement
Advertisement
Related Products
Sony BVW-75
Sony BVW-55
Sony BETACAM SP BVW-22P
Sony BETACAM SP BVW-65P
Sony BETACAM SP BVW-35P
Sony BVW-D75
Sony BVW-D75PS
Sony BETACAM SP BVV-5PS
Sony Professional BVU-900P
Sony BVU-950
Sony Categories
Laptop
TV
CD Player
Camcorder
Digital Camera
More Sony Manuals
Login
Sign In
OR
Sign in with Facebook
Sign in with Google
Upload manual
Upload from disk
Upload from URL