Sign In
Upload
Manuals
Brands
Sony Manuals
Digital Camera
EXPODISC A300
User Manuals: Sony EXPODISC A300 SLR Camera
Manuals and User Guides for Sony EXPODISC A300 SLR Camera. We have
3
Sony EXPODISC A300 SLR Camera manuals available for free PDF download: Instruction Manual, Quick Start Manual, Features Manual
Sony EXPODISC A300 Instruction Manual (207 pages)
Digital Single Lens Reflex Camera
Brand:
Sony
| Category:
Digital Camera
| Size: 66.39 MB
Table of Contents
Safe Use
3
Safe Installation
3
Ventilation
3
Important Safeguards
3
Damage Requiring Service
4
Lightning
4
Safe Servicing
4
Safety Check
4
Read this First
5
Disposal of Waste Batteries
7
Notes on the LCD Monitor and Lens
8
Shooting Procedure
8
Back up Recommendation
8
Notes on Using Your Camera
8
Table of Contents
9
Checking the Accessories Supplied
13
About Charging Lime
14
Preparing the Battery Pack
14
To Use Your Camera Abroad - Power Sources
15
Inserting the Charged Battery Pack
16
To Remove the Battery Pack
16
Available Battery Packs
17
What Is an "Infolithium" Battery Pack
17
To Check the Remaining Battery Level
17
To Remove the Battery Cover
17
Effective Use of the Battery Pack
18
Battery Life
18
How to Store the Battery Pack
18
Lens Hood
19
Attaching a Lens
19
To Remove the Lens
20
Note on Changing the Lens
20
If Dust or Debris Lands on the Image Sensor
20
Inserting a Memory Card
21
On the CF Card/Microdrive
22
Notes on Using Memory Cards
22
To Remove the Memory Card
22
On the "Memory Stick"
23
Notes on Using a "Memory Stick Duo"
23
Setting up the Date
25
Preparing the Camera
25
Attaching the Shoulder Strap
27
Using the Eyepiece Cover
27
Using the Accessories Supplied
27
Checking the Number of Recordable Images
29
The Number of Images that Can be Recorded Using a Battery Pack
30
Cleaning the Camera Surface
31
Cleaning the Lens
31
Cleaning the LCD Monitor
31
Cleaning the Image Sensor
32
Identifying Parts and Screen Indicators
34
Front Side
34
Product View
34
Rear Side
35
LCD Monitor
35
Sides/Bottom
37
LCD Monitor
38
To Switch the Recording Information Display
39
Selecting a Function/Setting
40
The Operation Guide List
41
Recording Menu/Custom Menu
42
The Functions Selected by the Fn (Function) Button
42
Playback Menu
43
Setup Menu
43
Correct Posture
44
Shooting Images Shooting an Image Without Camera Shake
44
Camera Shake Warning Indicator
45
Using the Super Steadyshot Function
46
Using a Tripod
47
Fmii!) /(!I) Shooting with the Automatic Setting
48
Shooting with a Suitable Setting for the Subject (Scene Selection)
50
Ilsi Taking Portrait Photos
50
Taking Landscape Photos
51
(J) Taking Small-Subject Photos
52
Taking Moving-Subject Photos
53
Taking Sunset Photos
54
I:2L Taking Night View Photos
55
Shooting an Image the Way You Want It (Exposure Mode)
56
Changing of Picture Brightness by the Amount of Exposure
56
P Shooting with Program Auto
57
To Use Program Shift
58
Shooting by Controlling the Blur of the Background (Aperture Priority)
59
(Shutter Speed Priority)
61
Shooting Moving Subject W. Various Expressions: Shutter Speed Priority
61
Shooting with the Exposure Adjusted Manually (Manual Exposure)
63
Manual Shift
64
M Shooting Trails with Long Exposure (BULB)
65
LCD Monitor (Recording Information Display)
67
Switching to the Viewfinder
67
To Deactivate the Eye-Start AF Function
67
Adjusting the Focus of the Finder (Diopter Adjustment)
68
When It Is Hard to Rotate the Diopter-Adjustment Dial
68
LCD Monitor (Recording Information Display)
69
Switching the Recording Information Display
70
Viewfinder
71
Shooting with the Viewfinder (OVF)
67
Focus Indicator
72
Using Autofocus
72
Shooting with Your Desired Composition (Focus-Lock)
73
Subjects that May Require Special Focusing
73
To Measure the Exact Distance to the Subject
73
Selecting Focus Method to Suit Movement of Subject (Autofocus Mode)
74
Adjusting the Focus Manually (Manual Focus)
75
Selecting the Focus Area (AF Area)
75
Selecting the Focus Method
72
Zooming in in One Step
77
Using the Flash
79
The AF Illuminator
80
The Flash Rang
80
To Deactivate the AF Illuminator
80
Performing Wireless Flash Shooting
81
Selecting the Flash Mode
81
The AEL Button Setting
82
Shooting with Fixed Brightness (AE Lock)
83
Adjusting the Brightness of the Image (Exposure, Flash Compensation, Metering)
83
To Check the Exposure of the Image
84
Brightness Compensation of the Entire Image (Exposure Compensation)
85
To Shoot While Checking the Screen Using the Histogram
87
Adjusting the Amount of Flash Light (Flash Compensation)
88
Selecting the Flash Control Mode to Set the Amount of Flash Light
88
Exposure Compensation and Flash Compensation
88
Selecting Method for Measuring Brightness of a Subject - Metering Mode
89
Setting ISO
90
Adjusting the Color Tones (White Balance)
91
Adjusting the White Balance to Suit a Specific Light Source
91
Setting the Color Temperature and a Filter Effect (Color Temperature/Color Filter)
92
Registering the Color Tones (Custom White Balance)
93
To Call the Custom While Balance Setting
94
Image Processing
95
Correcting the Brightness of the Image (D-Range Optimizer) Selecting Your Desired Image Processing (Creative Style)
95
About Adobe RGB Color Space
96
Shooting Single Shot
97
Shooting Continuously
97
The Maximum Number of Continuous Shots
97
Ql Selecting the Drive Mode
97
Using the Self-Timer
98
Shooting Images with the Exposure Shifted (Exposure Bracket)
98
The EV Scale in Bracket Shooting
99
Shooting with White Balance Shifted (WB Bracket)
100
Playing Back Images
101
To Return to the Shooting Mode
101
To Switch the Recording Data Display
101
Select Orientation of Image Recorded in Portrait Position
101
Rotating an Image
102
Enlarging Images
102
To Enlarge the Image Centering Around the Previously Selected Point
103
Switching to the Display of the Image List
104
Scaling Range
104
To Return to the Single-Image Screen
104
Playing Back Images Automatically (Slide Show)
105
To Select a Folder
105
To End in the Middle of the Slide Show
105
To Choose the Interval between the Images in Slide Show
105
Basic Information Display
106
Checking the Information of Recorded Images
106
Histogram Display
107
How to Check the Histogram
108
Protecting Images (Protect)
109
Deleting the Image that Is Currently Displayed
110
Deleting the Selected Images
110
Deleting Images (Delete)
110
Deleting All the Images in the Folder
111
Deleting All the Images All at Once
111
Viewing Images on a TV Screen
112
To Use Your Camera Abroad
113
On TV Color Systems
113
Setting Image Size and Image Quality
114
Aspect Ratio
115
Quality
115
About RAW Files
115
Selecting the Folder Name Format
116
Setting the Method for Recording on a Memory Card
116
Creating a New Folder
117
Selecting the Recording Folder
117
Formatting the Memory Card
117
Changing the Noise Reduction Setting
118
Prioritizing the Shutter Opportunity
119
Changing the Conditions under Which the Shutter Can be Released
119
Changing the Functions of the Button and Dial
120
Setting the Sound On/Off
121
Setting the Time to Turn the Camera to the Power Save Mode
121
Setting the Date/Selecting the Language
121
Changing Other Settings
121
Setting the Displayed Time of the Image Right after Shooting
122
Setting the Displayed Time of the LCD Monitor During Shooting
122
Setting the LCD Monitor
122
Keeping on the LCD Monitor While Looking into the Viewfinder
123
Resetting to the Default
124
Notes on Connecting Your Camera to a Computer
127
Recommended Computer Environment
127
Copying Images to Your Computer
127
Connecting Your Camera to a Computer
128
Copying Images to a Computer
129
Viewing Images on Your Computer
131
Deleting the USB Connection
132
Image File Storage Destinations and File Names
132
Copying Images Stored on Computer to Memory Card and Viewing Images
133
Using the Software
135
Installing the Software
136
Using "Picture Motion Browser"
138
Using "Image Data Converter SR"
139
Using "Image Data Lightbox SR"
140
Specifying DPOF
141
Dating Images
142
Creating an Index Print
142
Printing Images by Connecting Camera to Pictbridge Compliant Printer
143
Pictbridge Menu
145
Paper Size
145
To Cancel the Print
145
Layout
146
Date Imprint
146
Unmark All
146
Print All
146
Specifications
147
Troubleshooting
151
Battery Pack and Power Troubles
151
Shooting Images Troubles
152
Viewing Images Troubles
155
Deleting/Editing Images Troubles
155
Computers Troubles
155
Memory Card Troubles
156
Printing Troubles
157
Pictbridge Compliant Printer
158
Other Troubles
159
Warning Messages
161
Precautions
163
Notes on Recording/Playback
164
Index
165
Quick Start Guide
169
Accessories
174
Flash
175
ADI Flash Metering
175
Flash Guide Numbers
175
High-Speed Sync/Ttl Wireles Flash
175
Flashes Overview
176
Macro Twin Flash Kit
176
Ring Light
176
Vertical Grip
177
Rechargeable Battery Pack
178
AC Adaptor/Charger
178
Off-Camera Shoe for Flash
179
Off-Camera Cable for Flash
179
External Battery Adaptor for Flash
179
Multi Flash Cable
180
Extension Cable for Flash
180
Triple Connector for Flash
180
Sync Terminal Adaptor
180
Angle Finder
181
Magnifier
181
Eyepiece Correctors
181
Remote Commander
182
LCD Protect Cover
182
Eyepiece Cup
182
LCD Protect Sheete
182
Cases and Straps
183
Filters
187
System Chart
191
Cases and Straps View
192
Peripherals
193
Lens Specifications
201
Finding Your Model Number
205
Advertisement
Sony EXPODISC A300 Quick Start Manual (6 pages)
Brand:
Sony
| Category:
Digital Camera
| Size: 0.08 MB
Sony EXPODISC A300 Features Manual (3 pages)
ExpoDisc Custom White Balance Procedures
Brand:
Sony
| Category:
Digital Camera
| Size: 0.04 MB
Advertisement
Advertisement
Related Products
Sony a 3000 Series
Sony A330LDVDKIT
Sony A330 - Alpha Digital SLR
Sony A380L - Alpha 14.2 MP Digital SLR Camera
Sony A380Y - Alpha 14.2 MP Digital SLR Camera
Sony A390L2LENSKIT
Sony A3802LENSBDL
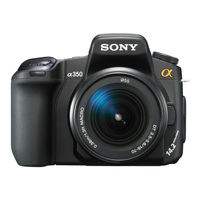
Sony DSLR A350 - a Digital Camera SLR
Sony A33
Sony a350
Sony Categories
Laptop
TV
Camcorder
CD Player
Digital Camera
More Sony Manuals
Login
Sign In
OR
Sign in with Facebook
Sign in with Google
Upload manual
Upload from disk
Upload from URL