Sign In
Upload
Manuals
Brands
Sony Manuals
Camcorder
PDW-F335K
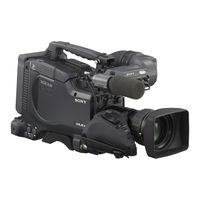
Sony PDW-F335K Manuals
Manuals and User Guides for Sony PDW-F335K. We have
3
Sony PDW-F335K manuals available for free PDF download: Operating Instructions Manual, Product Information
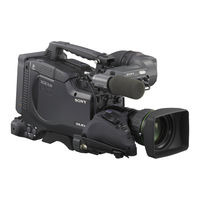
Sony PDW-F335K Operating Instructions Manual (193 pages)
Professional Disc Camcorder
Brand:
Sony
| Category:
Camcorder
| Size: 9.24 MB
Table of Contents
Table of Contents
6
Foreword
9
Before Use
9
Frame Frequency Indications for Interlaced Signals
9
Using the CD-ROM Manual
9
Preparations
9
Reading the CD-ROM Manual
9
Chapter 1 Overview
10
Product Configurations
10
Features
11
Camera Features
11
Features of the Optical Disc Drive (VDR)
11
Input/Output Features
13
Other Features
13
Location and Function of Parts
14
Front
14
Shutter Switch
15
Right Side
16
Lcd Monitor
17
Status Display on the LCD Monitor
18
Video Format
19
Earphone Jack
20
Next Button
21
Stop Button
21
Shift Button
22
Left Side and Upper Section
23
Rear
25
VCL-719BXS Auto Focus Lens (Supplied with the PDW-F335K)
27
Iris Switch
28
DXF-20W Viewfinder
29
Tally Light
30
Recording Format
30
Shutter Speed
31
Chapter 2 Preparations
32
Attaching and Replacing the Lithium Battery
32
Preparing a Power Supply
33
Using a Battery Pack
33
Using an AC Adaptor
33
Setting the Area of Use and the Frame Frequency
34
Using the Unit for the First Time
34
Setting the Frame Frequency
34
Setting the Date and Time of the Internal Clock
36
Preparing the Lens
37
Mounting the Lens
37
Adjusting the Flange Focal Length
37
Adjusting the Viewfinder
39
Detaching the Viewfinder
39
Adjusting the Viewfinder Position
39
Adjusting the Eyepiece Focus and the Screen (Brightness, Contrast, and Outline Emphasis)
39
Attaching a 5-Inch Electronic Viewfinder
40
Using the Shoulder Strap
41
Adjusting the Shoulder Pad Position
41
Mounting on a Tripod
42
Using a Video Light
42
Preparing the Audio Input System
43
Using the Supplied Microphone
43
Using an External Microphone
43
Attaching a UHF Synthesized Tuner
44
Connecting Line Input Audio Equipment
46
Connecting the Remote Control Unit
46
Connecting
48
Connecting an External Video Monitor
48
Using an I.link Connection
48
Connections for Using the PDZ-1
49
Chapter 3 Recording and Playback
50
Handling Discs
50
Discs Used for Recording and Playback
50
Notes on Handling
50
Write-Protecting Discs
50
Loading and Unloading a Disc
51
Formatting a Disc
51
Handling of Discs When Recording Does Not End Normally (Salvage Function)
52
Basic Procedure for Shooting
53
Recording - Basic Operations
55
Selecting the Recording Format
55
Adjusting the Black Balance/White Balance
56
Setting the Electronic Shutter
59
Adjusting the Iris
61
Adjusting the Audio Level
62
Setting the Time Data
63
Setting for Special Shooting Cases
66
Deleting Clips
66
Recording Shot Marks
67
Setting the Thumbnail Image at Recording Time
67
Recording - Advanced Operations
68
Time-Lapse Video Recording (Interval Rec Function)
68
Starting a Shoot with a few Seconds of Pre-Stored Picture Data (Picture Cache Function)
70
Assigning User-Defined Clip Titles Automatically
71
Assigning User-Defined Clip and Clip List Names
73
Internal Memory
75
Recording with the Clip Continuous Rec Function
75
Playback
76
Normal Playback
76
Checking the Last Two Seconds of the Recording (Recording Review)
77
Checking the Recording on a Color Video Monitor
77
Thumbnail Search
78
Searching Using Thumbnails
78
Switching the Information Displayed in the Thumbnail Screen
79
Changing the Thumbnail Image (Index Frame) of a Clip
79
Cuing up a Frame by Searching for an Essence Mark
80
Deleting Shot Marks
81
Searching Using the Chapter Function
81
Searching Using the Expand Function
81
Clip List Playback
82
Locking (Write-Protecting) Clips
83
Deleting Clips
84
Chapter 4 Scene Selection
86
Overview
86
Clip List
88
Creating Clip Lists
89
Including Sub Clips in the Current Clip List
89
Adding Sub Clips Using the Expand Function
91
Adding Sub Clips Using the Chapter Function
92
Editing Clip Lists
93
Reordering Sub Clips
93
Adjusting Sub Clip In/Out Points (Trimming)
93
Deleting Sub Clips
94
Saving the Current Clip List to Disc
94
Setting the Start Timecode for the Current Clip List
95
Switching the Information Displayed on Thumbnails
95
Managing Clip Lists
96
Loading a Clip List from the Disc as the Current Clip List
97
Deleting a Clip List from the Disc
97
Sorting the List of Clip Lists
97
Using the PDZ-1 Proxy Browsing Software
99
Chapter 5 Menu Displays and Detailed Settings
100
Menu Organization and Operation
100
TOP Menu
108
Menu List
109
Stored Picture Data (Picture Cache Function)
110
Displaying Menus
132
Basic Menu Operations
132
Using the USER Menu (Example Menu Operation)
133
Editing the USER Menu
134
Resetting USER Menu Settings to the Standard Settings
136
Resetting USER Menu Settings to the Factory Default Settings
137
Setting the Status Display on the Viewfinder Screen and the LCD Monitor
137
Selecting the Display Items
137
Change Confirmation/Adjustment Progress Messages
138
Setting the Marker Display
138
Setting the Viewfinder Screen Display
139
Recording Shot Data Superimposed on the Color Bars
139
Setting the Shot ID
140
Showing the Status Display
141
Adjustments and Settings from Menus
142
Setting Gain Values for the GAIN Switch Positions
142
Selecting the Output Signals
142
Setting the Color Temperature Manually
142
Specifying an Offset for the Auto White Balance Setting
143
Setting the Amount of Compensation for Color Casts by ND Filters
143
Selecting Gamma Tables
144
Making Low-Noise Mode Settings
144
Assigning Functions to ASSIGN Switches
145
Selecting the Lens File
145
Selecting the Aspect Ratio
146
About the CCD Scan Mode
146
Chapter 6 Saving and Loading User Setting Data
148
Saving and Loading User Files
148
Handling the "Memory Stick
148
Saving USER Menu Data (User File) to the "Memory Stick
149
Loading Saved Data from a "Memory Stick
151
Saving and Loading Scene Files
152
Saving a Scene File
152
Loading Scene Files
154
Resetting the Settings of the Camcorder to the Standard Settings
155
Chapter 7 File Operation
157
Overview
157
Directory Structure
157
File Operation Restrictions
158
File Access Mode File Operations (for Windows)
160
Making FAM Connections
160
Operating on Files
161
Exiting File Operations
161
File Operations in File Access Mode (for Macintosh)
162
Making FAM Connections
162
Operating on Files
163
Exiting File Operations
163
Recording Continuous Timecode over FAM Connections
164
Appendix
165
Important Notes on Operation
165
Phenomena Specific to CCD Image Sensors
166
Condensation
166
Maintenance
167
Testing the Camcorder before Shooting
167
Testing the Vdr
168
Maintenance
169
Note about the Battery Terminal
169
Operation Warnings
170
Troubleshooting
174
Using UMID Data
176
MPEG-4 License
178
MPEG-2 Video Patent Portfolio License
178
About I.link
179
About a "Memory Stick
180
Specifications
181
Chart of Optional Components and Accessories
185
Glossary
186
Index
189
Advertisement
Sony PDW-F335K Operating Instructions Manual (188 pages)
Professional Disc Camcorder
Brand:
Sony
| Category:
Camcorder
| Size: 7.18 MB
Table of Contents
Table of Contents
4
Foreword
7
Before Use
7
Frame Frequency Indications for Interlaced Signals
7
Chapter 1 Overview
8
Product Configurations
8
Features
9
Camera Features
9
Features of the Optical Disc Drive (VDR)
9
Input/Output Features
11
Other Features
11
Location and Function of Parts
12
Front
12
Shutter Switch
13
Right Side
14
Lcd Monitor
15
Status Display on the LCD Monitor
16
Video Format
17
Earphone Jack
18
Next Button
19
Stop Button
19
Shift Button
20
Left Side and Upper Section
21
Rear
23
VCL-719BXS Auto Focus Lens (Supplied with the PDW-F335K)
25
Iris Switch
26
DXF-20W Viewfinder
27
Status Display on the Viewfinder Screen
28
Shutter Speed
29
Chapter 2 Preparations
30
Attaching and Replacing the Lithium Battery
30
Preparing a Power Supply
31
Using a Battery Pack
31
Using an AC Adaptor
31
Setting the Area of Use and the Frame Frequency
32
Using the Unit for the First Time
32
Setting the Frame Frequency
32
Setting the Date and Time of the Internal Clock
34
Preparing the Lens
35
Mounting the Lens
35
Adjusting the Flange Focal Length
35
Adjusting the Viewfinder
37
Detaching the Viewfinder
37
Adjusting the Viewfinder Position
37
Adjusting the Eyepiece Focus and the Screen (Brightness, Contrast, and Outline Emphasis)
37
Attaching a 5-Inch Electronic Viewfinder
38
Using the Shoulder Strap
39
Adjusting the Shoulder Pad Position
39
Mounting on a Tripod
40
Using a Video Light
40
Preparing the Audio Input System
41
Using the Supplied Microphone
41
Using an External Microphone
41
Attaching a UHF Synthesized Tuner
42
Connecting Line Input Audio Equipment
44
Connecting the Remote Control Unit
44
Connecting
46
Connecting an External Video Monitor
46
Using an I.link Connection
46
Connections for Using the PDZ-1
47
Chapter 3 Recording and Playback
48
Handling Discs
48
Discs Used for Recording and Playback
48
Notes on Handling
48
Write-Protecting Discs
48
Loading and Unloading a Disc
49
Formatting a Disc
49
Handling of Discs When Recording Does Not End Normally (Salvage Function)
50
Basic Procedure for Shooting
51
Recording - Basic Operations
53
Selecting the Recording Format
53
Adjusting the Black Balance/White Balance
54
Setting the Electronic Shutter
57
Adjusting the Iris
59
Adjusting the Audio Level
60
Setting the Time Data
61
Setting for Special Shooting Cases
63
Deleting Clips
64
Recording Shot Marks
65
Setting the Thumbnail Image at Recording Time
65
Recording - Advanced Operations
66
Time-Lapse Video Recording (Interval Rec Function)
66
Starting a Shoot with a few Seconds of Pre-Stored Picture Data (Picture Cache Function)
68
Assigning User-Defined Clip Titles Automatically
69
Assigning User-Defined Clip and Clip List Names
71
Internal Memory
73
Recording with the Clip Continuous Rec Function
74
Playback
75
Normal Playback
75
Checking the Last Two Seconds of the Recording (Recording Review)
76
Checking the Recording on a Color Video Monitor
76
Thumbnail Search
76
Searching Using Thumbnails
76
Switching the Information Displayed in the Thumbnail Screen
77
Changing the Thumbnail Image (Index Frame) of a Clip
78
Cuing up a Frame by Searching for an Essence Mark
79
Searching Using the Chapter Function
79
Searching Using the Expand Function
80
Clip List Playback
80
Locking (Write-Protecting) Clips
81
Deleting Clips
83
Chapter 4 Scene Selection
85
Overview
85
Clip List
87
Creating Clip Lists
88
Including Sub Clips in the Current Clip List
88
Adding Sub Clips Using the Expand Function
90
Adding Sub Clips Using the Chapter Function
91
Editing Clip Lists
92
Reordering Sub Clips
92
Adjusting Sub Clip In/Out Points (Trimming)
92
Deleting Sub Clips
93
Saving the Current Clip List to Disc
93
Setting the Start Timecode for the Current Clip List
94
Switching the Information Displayed on Thumbnails
94
Managing Clip Lists
95
Loading a Clip List from the Disc as the Current Clip List
96
Deleting a Clip List from the Disc
96
Sorting the List of Clip Lists
96
Using the PDZ-1 Proxy Browsing Software
97
Chapter 5 Menu Displays and Detailed Settings
98
Menu Organization and Operation
98
TOP Menu
106
Menu List
107
Displaying Menus
129
Basic Menu Operations
129
Using the USER Menu (Example Menu Operation)
130
Editing the USER Menu
131
Resetting USER Menu Settings to the Standard Settings
133
Resetting USER Menu Settings to the Factory Default Settings
134
Setting the Status Display on the Viewfinder Screen and the LCD Monitor
135
Selecting the Display Items
135
Change Confirmation/Adjustment Progress Messages
135
Setting the Marker Display
136
Setting the Viewfinder Screen Display
136
Recording Shot Data Superimposed on the Color Bars
137
Setting the Shot ID
137
Showing the Status Display
138
Adjustments and Settings from Menus
139
Positions
139
Setting Gain Values for the GAIN Switch Positions
139
Selecting the Output Signals
139
Setting the Color Temperature Manually
140
Specifying an Offset for the Auto White Balance Setting
140
Selecting Gamma Tables
141
Making Low-Noise Settings
141
Assigning Functions to ASSIGN Switches
141
Selecting the Lens File
142
Selecting the Aspect Ratio
142
About the CCD Scan Mode
143
Chapter 6 Saving and Loading User Setting Data
145
Saving and Loading User Files
145
Handling the "Memory Stick
145
Saving USER Menu Data (User File) to the "Memory Stick
146
Loading Saved Data from a "Memory Stick
148
Saving and Loading Scene Files
149
Saving a Scene File
149
Loading Scene Files
151
Resetting the Settings of the Camcorder to the Standard Settings
152
Chapter 7 File Operation
154
Overview
154
Directory Structure
154
File Operation Restrictions
155
File Access Mode File Operations
157
Exiting File Operations
158
Operating on Files
158
Recording Continuous Timecode over FAM Connections
159
Appendix
160
Important Notes on Operation
160
Phenomena Specific to CCD Image Sensors
161
Condensation
161
Maintenance
162
Testing the Camcorder before Shooting
162
Testing the Vdr
163
Maintenance
164
Note about the Battery Terminal
164
Operation Warnings
165
Troubleshooting
169
Using UMID Data
171
MPEG-4 License
173
About I.link
173
About a "Memory Stick
174
Specifications
176
Chart of Optional Components and Accessories
180
Glossary
181
Index
184
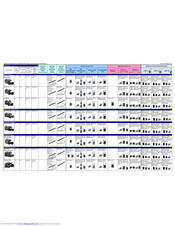
Sony PDW-F335K Product Information (2 pages)
Product Information Document (DWX and WL800 Camcorder Combo Chart)
Brand:
Sony
| Category:
Camcorder
| Size: 0.49 MB
Advertisement
Advertisement
Related Products
Sony PDW-F335KL
Sony PDW-F335L
Sony PDW-F800
Sony PDW-F330K
Sony PDW-F330L
Sony PDW-F350L
Sony PDW-F355L
Sony XDCAM PDW-F355
Sony PDW-F335
Sony XDCAM PDW-850
Sony Categories
Laptop
TV
CD Player
Camcorder
Digital Camera
More Sony Manuals
Login
Sign In
OR
Sign in with Facebook
Sign in with Google
Upload manual
Upload from disk
Upload from URL