Sign In
Upload
Manuals
Brands
Toshiba Manuals
Laptop
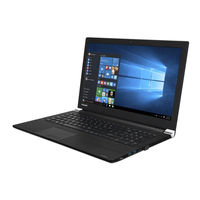
Satellite PRO T230D SERIES
Toshiba Satellite PRO T230D SERIES Manuals
Manuals and User Guides for Toshiba Satellite PRO T230D SERIES. We have
2
Toshiba Satellite PRO T230D SERIES manuals available for free PDF download: Maintenance Manual, User Manual
Toshiba Satellite PRO T230D SERIES Maintenance Manual (246 pages)
Personal Computer
Brand:
Toshiba
| Category:
Laptop
| Size: 9.33 MB
Table of Contents
Table of Contents
6
Table of Contents
10
Chapter 1
17
Features
17
Figure 1-1A ID Parts Description Placement Part a
21
Hardware Overview
21
Figure 1-2 SATA HDD
25
Power Supply
26
Batteries
28
Battery Charging Control
28
Main Battery
28
RTC Battery
29
Figure
33
Chapter 2
34
Troubleshooting Introduction
34
Troubleshooting Flowchart
35
Figure 2-1 Troubleshooting Flowchart (1/2)
36
Troubleshooting Procedures
36
Figure 2-1 Troubleshooting Flowchart (2/2)
37
Figure 2-2 Power Supply Troubleshooting Process
40
Power Supply Troubleshooting
40
Display Troubleshooting
45
Figure 2-3 Display Troubleshooting Process
45
Figure 2-4 Keyboard Troubleshooting Process
48
Keyboard Troubleshooting
48
2.6 External USB Devices Troubleshooting
50
Figure 2-5 External USB Device Troubleshooting Process
50
2.7 Touch Pad Troubleshooting
52
Figure 2-6 Touchpad Troubleshooting Process
52
2.8 Speaker Troubleshooting
54
Figure 2-7 Speaker Troubleshooting Process
54
Figure 2-8 Wireless LAN Troubleshooting Process
56
Wireless LAN Troubleshooting
56
Figure 2-9 Camera Troubleshooting Process
58
Figure 2-10 Bluetooth Troubleshooting Process
60
Figure 2-11 4 in 1 Card Troubleshooting Process
62
Figure 2-12 HDD Troubleshooting Process
64
Figure 2-13 CRT Troubleshooting Process
66
Figure 2-14 LAN Troubleshooting Process
68
Figure 2-15 MIC Troubleshooting Process
70
Figure 2-16 3D Sensor Troubleshooting Process
72
Figure 2-17 3G Troubleshooting Process
74
Figure 2-18 HDMI Troubleshooting Process
77
Figure 2-19 E-SATA Troubleshooting Process
79
Figure 2-20 Wimax Troubleshooting Process
81
The Diagnostic Test
84
Chapter 3
85
The Diagnostic Test
85
Executing the Diagnostic Test
86
Display Configuration
89
Audio Sound Test
90
Fan ON/OFF Test
93
Main Battery Charge Test
95
FDD Test
96
Memory Test
97
Keyboard Test
100
Mouse (Pad) Test
102
Lcd Pixels Mode Test
103
Magnetic Switch Test
104
LAN Test
106
RTC Test
108
HDD Test
113
Toshiba Logo Set
119
TP Type R/W Test
121
Ee-Prom Setting
124
Replacement Procedures
130
General
135
Safety Precautions
136
Before You Begin
138
Assembly Procedures
139
Disassembly Procedures
139
Screw Tightening Torque
140
Tools and Equipment
140
Colors of Screw Shanks
141
Symbol Examples
141
Symbols of Screws on the Laptop Body
141
Battery
142
Figure 4.1 Removing the Battery Pack
142
Removing the Battery Pack
142
Installing the Battery Pack
143
Figure 4.2 Removing the HDD Door
144
Hdd
144
Removing the HDD
144
Figure 4.3 Removing the HDD
145
Figure 4.4 Removing the HDD Bracket
145
Installing the HDD
146
Figure 4.5 Removing the HDD Door
147
Memory
147
Removing the Optional Memory
147
Figure 4.6 Removing the Memory from the Laptop
148
Installing the Optional Memory
149
Figure 4.7 Removing Two Screws
150
Figure 4.8 Pushing the Keyboard up with a Pin
150
Keyboard
150
Removing the Keyboard
150
Figure 4.10 Disconnecting the Keyboard FFC
151
Figure 4.9 Lifting up the Keyboard
151
Installing the Keyboard Cover and Keyboard
152
Figure 4.11 Removing Nine Screws from the Bottom of the Laptop
153
Logic Upper Assembly
153
Removing the Logic Upper Assembly
153
Figure 4.12 Disconnect Two FFC and Removing Five Screws from the Logic Upper Assembly
154
Figure 4.13 Removing the Logic Upper Assembly
155
Installing the Logic Upper Assembly
155
Figure 4.14 Disconnecting the TP Button FFC and Remove Four Screws
156
Removing the Touch Pad Bracket and TP Button Board
156
Touch Pad Bracket and TP Button Board
156
Figure 4.15 Removing the TP Button Board
157
Installing the Touch Pad Bracket and TP Button Board
158
Figure 4.16 Peeling off the Power Board FFC
159
Power Board
159
Removing the Power Board
159
Figure 4.17 Removing the Power Board
160
Installing the Power Board
160
Figure 4.18 Disconnect the FFC and Remove Two Screws
161
Removing the RGB Board
161
RGB Board
161
Figure 4.19 Removing the RGB Board
162
Installing the RGB Board
162
Figure 4.20 Removing the WLAN Card
163
Removing the WLAN Card
163
WLAN Card
163
Installing the WLAN Card
164
Figure 4.21 Removing the WWAN Card
165
Removing the WWAN Card
165
WWAN Card
165
Installing the WWAN Card
166
Figure 4.22 Removing the Minicard Brackets
167
Installing the Minicard Brackets
167
Minicard Brackets
167
Removing the Minicard Brackets
167
Display Assembly
168
Figure 4.23 Removing the Display Assembly
168
Removing the Display Assembly
168
Installing the Display Assembly
169
Figure 4.24 Removing the USB & Audio Board
170
Installing the USB & Audio Board
170
Removing the USB & Audio Board
170
USB & Audio Board
170
Figure 4.25 Disconnect the FFC and Remove Two Screws
172
HDD Board
172
Removing the HDD Board
172
Figure 4.26 Removing the HDD Board
173
Installing the HDD Board
173
Figure 4.27 Removing the LED Board
174
Installing the LED Board
174
LED Board
174
Removing the LED Board
174
Figure 4.28 Removing the Speakers
175
Installing the Speakers
175
Removing the Speakers
175
Speakers
175
Bluetooth Combined with Cable Module
176
Figure 4.29 Removing the Bluetooth Card
176
Installing the Bluetooth Combined with Cable Module
176
Removing the Bluetooth Combined with Cable Module
176
Figure 4.30 Removing the Thermal Fan from the Logic Lower Assembly
177
Removing the Thermal Fan
177
Thermal Fan
177
Installing the Thermal Fan
178
Motherboard
178
Figure 4.31 Removing the Motherboard from Logic Lower Assembly
179
Motherboard
179
Removing the Motherboard
179
Installing the Motherboard
180
Figure 4.32 Removing the Thermal Module
181
Installing the Thermal Module
181
Removing the Thermal Module
181
Thermal Module
181
Figure 4.33 Reapply Shinetsu 7762 Grease on the Thermal Module and Remove any Release Papers
182
Installing the Thermal Module
182
Figure 4.34 Removing Two Screws from LCD Bezel
183
LCD Bezel
183
Removing the LCD Bezel
183
Figure 4.35 Prying up the LCD Bezel
184
Figure 4.36 Removing the LCD Bezel
184
Installing the LCD Bezel
185
Figure 4.37 Removing the LCD Module from the LCD Cover Assembly
186
Figure 4.38 Disconnect the Cable from the Camera Module
186
LCD Module
186
Removing the LCD Module
186
Figure 4.39 Removing the LCD Hinges
187
Figure 4.40 Removing the LVDS Cable from the LCD Panel
188
Figure 4.41 Installing the LCD Hinge Assembly
189
Installing the LCD Module
189
Camera Module
190
Figure 4.42 Removing the Camera Module
190
Installing the Camera Module
190
Removing the Camera Module
190
Antennas for WLAN
191
Figure 4.43 Removing the Antennas from the LCD Cover Assembly
191
Removing the Antennas for WLAN
191
Figure 4.44 Peeling off the Foil and Removing the Antennas
192
Installing the Antennas for WLAN
193
Appendix A Handling the LCD Module
194
Appendix B Board Layout
199
Appendix C Pin Assignments
204
System Board
204
Appendix D Keyboard Scan/Character Codes
227
Appendix E Key Layout
227
Appendix F Series Screw Torque List
246
Appendix G Reliability
246
Advertisement
Toshiba Satellite PRO T230D SERIES User Manual (166 pages)
Satellite/Satellite pro/portege Computer
Brand:
Toshiba
| Category:
Laptop
| Size: 4.33 MB
Table of Contents
Table of Contents
2
Copyright
5
Disclaimer
5
Trademarks
5
FCC Information
6
Fcc Conditions
6
EU Declaration of Conformity
7
VCCI Class B Information
8
Canadian Regulatory Information (Canada Only)
8
Following Information Is Only Valid for EU-Member States
9
Disposing of the Computer and the Computer's Batteries
9
REACH - Compliance Statement
10
Following Information Is Only for Turkey
10
Precautions
10
Preface
11
Conventions
11
Key Operation
12
General Precautions
14
Provide Adequate Ventilation
14
Creating a Computer-Friendly Environment
15
Stress Injury
15
Heat Injury
15
Pressure or Impact Damage
16
Mobile Phones
16
Instruction Manual for Safety and Comfort
16
Chapter 1 Getting Started
17
Equipment Checklist
17
Getting Started
17
Connecting the Ac Adaptor
20
Opening the Display
22
Turning on the Power
23
Starting up for the First Time
23
Turning off the Power
24
Sleep Mode
24
Hibernation Mode
26
Restarting the Computer
27
System Recovery Options
28
System Recovery
29
Chapter 2 The Grand Tour
32
Front with the Display Closed
32
Left Side
33
Right Side
34
Back
35
Underside
36
Front with the Display Open
37
Wireless Lan
38
Wireless Wan
38
Video Mode
39
Indicators
40
Keyboard Indicators
42
AC Adaptor
43
Chapter 3 Hardware, Utilities and Options
44
Hardware
44
Special Features
51
Utilities and Applications
54
Optional Devices
57
Bridge Media Slot
58
Memory Media
59
Memory Card Care
60
Removing a Memory Media
61
Additional Memory Module
62
Installing a Memory Module
63
Removing a Memory Module
66
External Monitor
68
Connecting the Monitor Cable
68
Security Lock
72
Optional Accessories
73
Chapter 4 Operating Basics
74
Using the Touch Pad
74
Web Camera
75
Using the TOSHIBA Face Recognition
76
TOSHIBA Disc Creator
79
Data Verification
80
Sound System
81
Power Management
82
Speaker Configuration
82
Wireless Communications
84
Product Support
86
Lan
87
Wireless Communication Indicator
87
Computer Handling
89
Using the Hard Disk Drive (HDD) Protection
90
Using the TOSHIBA Sleep and Charge Function
92
Heat Dispersal
94
Chapter 5 The Keyboard
95
Typewriter Keys
95
Function Keys: F1
96
Soft Keys: FN Key Combinations
96
Hot Keys
97
Windows Special Keys
99
Keypad Overlay
100
Temporarily Changing Modes
101
Generating ASCII Characters
102
Chapter 6 Power and Power-Up Modes
103
Power Conditions
103
Monitoring of Power Condition
104
Battery
105
Charging the Batteries
107
Monitoring Battery Capacity
109
Maximizing Battery Operating Time
109
Retaining Data with Power off
110
Extending Battery Life
110
Replacing the Battery Pack
110
Removing the Battery Pack
111
Installing the Battery Pack
112
Password Utility
113
Power-Up Modes
114
Panel Power On/Off
115
System Automatic Sleep/Hibernation
115
Chapter 7 HW Setup
116
Accessing HW Setup
116
HW Setup Window
116
User Password
117
Enter Password
117
Boot Priority
118
Boot Speed
119
Chapter 8 Troubleshooting
122
Problem Solving Process
122
Preliminary Checklist
122
Analyzing the Problem
123
Hardware and System Checklist
124
System Start-Up
124
Self Test
125
Overheating Power down
125
Ac Power
126
Real Time Clock
128
Internal Display Panel
129
Hard Disk Drive
130
Pointing Device
131
Touch Pad
131
Usb Mouse
132
Usb Device
133
Usb Sleep and Charge Function
134
Esata Device
135
TOSHIBA Support
139
Recovery Media
139
Specifications
141
Physical Dimensions
141
Environmental Requirements
141
Appendix A Specifications
142
Display Controller and Video Mode
142
Display Controller
142
Video Mode
142
Appendix B Display Controller and Video Mode
143
Appendix C Wireless LAN
143
Card Specifications
143
Radio Characteristics
144
Supported Frequency Sub-Bands
145
Wireless LAN
143
Appendix D Bluetooth Wireless Technology Interoperability
148
Bluetooth Wireless Technology and Your Health
149
Regulatory Statements
149
Using Bluetooth Adaptor from TOSHIBA Equipment in Japan
151
Device Authorization
152
AC Power Cord and Connectors
153
Certification Agencies
153
Appendix E AC Power Cord and Connectors
155
TOSHIBA PC Health Monitor
155
Starting the TOSHIBA PC Health Monitor
156
If a TOSHIBA PC Health Monitor Message Is Displayed
156
Appendix F TOSHIBA PC Health Monitor
157
Appendix G Legal Footnotes
157
Non-Applicable Icons
157
Cpu
157
Memory (Main System
158
Battery Life
159
Hard Disk Drive (HDD) Capacity
159
Lcd
159
Graphics Processor Unit ("GPU
159
Wireless LAN
160
Copy Protection
160
Glossary
161
Index
163
Legal Footnotes
157
Advertisement
Related Products
Toshiba Satellite Pro T130
Toshiba Protege R200
Toshiba Satellite Pro T110D
Toshiba Protege Z30-A
Toshiba Protege Z30t-A
Toshiba Satellite Pro T110DD
Toshiba Satellite ProT130D
Toshiba Satellite PRO T230
Toshiba Satellite Pro T210 series
Toshiba Satellite Pro T210D Series
Toshiba Categories
Laptop
Air Conditioner
TV
LCD TV
All in One Printer
More Toshiba Manuals
Login
Sign In
OR
Sign in with Facebook
Sign in with Google
Upload manual
Upload from disk
Upload from URL