Sign In
Upload
Manuals
Brands
Xerox Manuals
All in One Printer
Color C75 Press
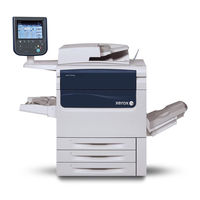
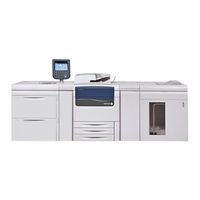
Xerox Color C75 Press Manuals
Manuals and User Guides for Xerox Color C75 Press. We have
4
Xerox Color C75 Press manuals available for free PDF download: User Manual, System Administration Manual, Quick Start Manual, Specification
Xerox Color C75 Press System Administration Manual (286 pages)
Color Press
Brand:
Xerox
| Category:
All in One Printer
| Size: 1.45 MB
Table of Contents
Table of Contents
3
Administrator Overview
21
Enter/Exit Administrator Mode
21
Customizing the UI Buttons/Screens
21
Assigning a Feature to the Screens and Buttons
22
Enabling Stored Programming
22
Energy Saver Mode
22
Low Power Mode
23
Sleep Mode
23
Set/Change the Energy Saver Mode Time Intervals
23
Exiting Power Saver Mode
24
Configuration
25
Netware
25
Preparations
25
Microsoft ® Network (SMB)
26
Preparations
26
Configuration Procedure
26
Configuration on the Machine (SMB)
26
Using Centreware Internet Services
29
Preparations
29
Configuration Procedure
29
Configuration on the Machine
30
Connect to Centreware Internet Services from a Computer
30
Network Setting Items for Centreware Internet Services
31
Ethernet
32
Ethertalk
32
Microsoft Networking (SMB)
32
Netware
33
Tcp/Ip
34
Lpd
36
Snmp
36
Ftp
38
Pop3
39
Proxy Server
39
Smtp
40
Wsd
40
Ipp
40
Port 9100 - Raw TCP/IP Printing
41
Ldap
41
Http
43
Encrypting HTTP Communication
43
Additional HTTP Information
44
Webdav
45
E-Mail
45
Setting the E-Mail Items
45
Network Scanning
47
Creating Job Templates
47
Adding a New Template
47
Adding a Job Template File Destination
48
Software Applications and Options
49
Installing Software Applications/Options
49
SIQA Software Installation
50
Installing the SIQA Software on a PC
50
Setting up Communication between the SIQA Application and the Print Engine
51
Setting up and Running SIQA Software on an EX Print Server
51
Setting up and Running SIQA Software on a PC Via an EX Print Server or Integrated Fiery Color Server
52
Setting up and Running SIQA Software on a PC When a Freeflow Print Server Is Installed
52
Xerox Extensible Interface Platform (XEIP)
53
Important Preliminary Information
53
Digital Certificate
54
Enabling Extensible Service Registration
54
Ssl
54
Ipv4 Default Enablement
55
Ports
55
Optional Software Kits
55
Remote Services
57
Setting up Remote Services
58
How to Set up Your Device
58
Network Access
58
Set up the Proxy Server
58
Troubleshooting Connection Problems
64
Problem
64
Solutions
64
Dead Internet Connection
64
DNS Server
64
Firewall Problems
64
Internet Cable Problem
64
Network Changes: Blocked or Disabled Service
64
Tcp/Ip
64
Persistent Problems
65
Mail
67
Mail Notice
67
Job Completion Notice
67
Scanner (Mail Transmission)
67
Preparations
68
Register a Mail Account
69
Configuring the E-Mail Environment
69
Configuration Procedure
69
Enabling the Ports and Setting the IP Addresses
70
Configuring the E-Mail Environment
70
If SMTP Has Been Selected for the E-Mail Receiving Protocol
71
Configuring Email Settings
71
Editing Default Email Settings
72
Using the Scan Service
75
Scan Service Overview
75
E-Mail
76
Store to Folder
76
Scan to PC
76
Store to USB
76
Job Flow Scanning
76
Store and Send Link
76
Store to Web Services for Devices (WSD)
76
Setting up Access Rights
76
Authentication
77
Authorization
77
Personalization
77
Local Authentication
78
Setting up Local Authentication
78
User Information
78
Adding User Information to the Local Database
78
Specifying Login Requirements
79
Network Authentication
79
Setting up Network Authentication
79
Configuring Authentication Server Settings for Kerberos
80
Configuring Authentication Server Settings for SMB
80
Configuring Authentication Server Settings for LDAP
80
Authentication Using a Card Reader System
81
Setting up Authentication for Xerox Secure Access
81
Configuring Xerox Secure Access Login Settings
81
Setting up Authentication for a USB Smartcard Reader System
82
Configure Network Authentication Settings
82
Configure Smartcard Link Mode Settings
82
Enable Smartcard Settings
82
Configuring Certificate Revocation Retrieval Settings
83
Setting the Smartcard Certificate Verification Mode
83
Configuration of Store to Folder
83
Enabling the Port and Setting up TCP/IP
83
Registering a Folder
84
Configuring a Computer
84
Configuration of Scan to PC
84
Preparations
85
Scanning with SMB
85
Using Scanning with FTP
85
Enabling the Port and Setting up TCP/IP
86
Configuration on the Computer
86
Configuration of Store to USB
87
USB Memory Devices
87
Enabling Store to USB
87
Configuration of Job Flow Sheets
88
Enabling the Ports and Setting up TCP/IP
88
Configuring the SNMP Port
88
Configuration on the Computer
89
Configuration of Store and Send Link
89
Setting Email Options
89
Changing the File Format
90
Changing the File Name, Message, or Reply to Email Options
90
Requesting a Read Receipt
90
Other Settings
90
Centreware Internet Service Setting Items
90
Configuration of Store to WSD
91
Preparations
91
Enabling the WSD Scan Port
91
Enabling WSD at a Workstation
92
Printing a Configuration Report
92
Configuring Scan Service Settings
92
Tools (Administrator Mode)
93
System Settings
93
Common Service Settings
93
Copy Service Settings
96
Connectivity and Network Setup
102
Scan Service Settings
104
14 Folder Service Settings
106
Files Retrieved by Client
106
Address Book Settings
106
E-Mail Service Settings
106
Folder Service Settings
106
Print & Delete Confirmation Screen
106
15 Job Flow Service Settings
107
Pool Server
107
Pool Server Login Method
107
Job Flow Service Settings
107
Job Flow Sheet List Default
107
Stored File Settings
107
Setup and Calibration
107
Accounting
107
Authentication/Security Settings
108
Common Service Settings
109
Machine Clock/Timers
109
Setting the Machine Clock/Timers
110
Connection Interval
111
Date and Time
111
NTP Time Synchronization
111
Time Server Address
111
Auto Clear
112
Auto Job Release
112
Auto Print
112
Daylight Savings
113
Print-On-Demand Duration
113
Printer Lockout Duration
113
Time Zone
113
Energy Saver Timers
113
Audio Tones
114
Setting Audio Tones
115
Stored Programming Tone
116
Stored Programming Complete Tone
116
Screen/Button Settings
116
Service Screen after Auto Clear
117
Assigning Screen/Button Settings
117
Reconfirm E-Mail Recipient Screen
118
Customize Keyboard Button
118
Custom Paper and Custom Paper Color Settings
119
Paper Tray Settings
119
Paper Tray Attributes
120
Paper Tray Attributes
121
Customize Paper Settings
121
Change Paper Settings During Loading
122
Paper Tray Priority
122
Paper Type Priority
122
Tray 5 (Bypass) - Paper Size Defaults
122
Auto Tray Switching
123
Image Quality Adjustment
124
Photo and Text Recognition
124
Background Suppression (Black Copy)
124
Background Suppression (Scan Jobs)
125
Image Enhancement
125
Reports
125
Print Reports Button
125
Job History Report
125
Scan File Transfer Report
125
Sided Report
126
Job Flow Error Report
126
Maintenance
126
Initialize Hard Disk Drive
127
Software Options
127
Delete Certificates/Initialize Settings
128
Alignment Adjustment
128
Alignment Adjustment Information
129
Alignment Adjustment Options
129
Things to Consider When Creating/Using an Alignment Procedures
129
Auto Alignment Adjustment
132
Manual Alignment Adjustment Procedure
136
Adjust Paper Curl
138
Adjust Paper Curl Options
139
Adjust Paper Curl Types A, B, C
139
Adjust Paper Curl Types 1-10
140
Adjusting the Paper Curl
141
Adjust Fold Position (Finisher Adjustment)
142
Adjusting the Fold Position
142
Adjusting the Single Fold Position
143
Adjusting the Booklet Fold Position
144
Adjusting the C Fold Position
145
Adjusting the Z Fold Position
146
Adjusting the Z Fold Half Sheet Position
148
Density Uniformity Adjustment
149
Adjusting Values
152
Power on Self Test
152
USB Key
152
Watermark
153
Date Format
153
Default Watermark Effect
153
Default Watermark
153
Font Size
154
Background Pattern
154
Density
154
Watermark/Background Contrast
154
Force Watermark - Copy
154
Force Watermark - Client
154
Force Watermark - Print Stored File
154
Force Watermark - Media Print
155
Custom Watermarks - 1 through 3
155
Secure Watermark
155
Secure Watermark Control
155
Digital Codes Settings
155
Force Secure Watermark
155
Secure Watermark Defaults
155
Secure Watermark Effect
155
Force Annotations
156
Print Universal Unique ID
156
Notify Job Completion by E-Mail
156
Plug-In-Settings
157
Other Settings
157
Offset Stacking (Middle Right Tray)
157
Auto Job Promotion
157
Default Print Paper Size
158
Paper Size Settings
158
Keyboard Input Restriction
158
Operation of Up/Down Buttons
158
Data Encryption
158
Encryption Key for Confidential Data
159
Service Rep. Restricted Operation
159
Software Download
159
Document Feeder Tray Elevation
159
When Loading Originals
160
When Pressing Start
160
Estimated Job Time
160
Cumulative Time for All Jobs
160
Time Required for a Single Job
160
Restrict Recipient Selection Method
160
Restrict User to Edit Address Book
160
Paper Tray Attributes During Loading
160
Paper Size
161
Paper Type Priority
161
Auto Size Detect
161
Customize Paper Settings
161
Paper Type Priority
162
Auto Tray Switching Control
162
Gloss Mode
162
10 Copy Service Settings
165
Preset Buttons
165
Copy Service Settings
165
Original Type
166
Paper Supply
166
Reduce/Enlarge
166
Copy Defaults
166
Background Suppression
167
Edge Erase - Bottom Edge
167
Edge Erase - Left Edge
167
Edge Erase - Top Edge
167
Lighten/Darken
167
Mixed Size Originals
167
Sharpness
167
Sided
167
Copy Output
168
Edge Erase- Right Edge
168
Edge Erase- Side 2
168
Image Rotation
168
Image Shift
168
Image Shift - Side 2
168
Original Orientation
168
Sample Job
168
Uncollated - Separator Tray
168
Annotations - Apply Comment to
169
Annotations - Apply Date Stamp to
169
Annotations - Apply Page Numbers to
169
Annotations - Comment
169
Annotations - Comment Position
169
Annotations - Date
169
Annotations - Font Size
169
Annotations - Page Numbers
169
Annotations - Position on Side 2
169
Annotations - Stored Comment
169
Annotations - Apply Bates Stamp to
170
Annotations - Bates Stamp
170
Bates Stamp - Number of Digits
170
Bates Stamp - Starting Number
170
Page Number Starting Number
170
Page Numbers - Position
170
Tab Margin Shift
170
Booklet Creation
171
Covers - Default Back Cover
171
Covers - Default Front Cover Tray
171
Memory Full Procedure
171
Separators - Default Separator Tray
171
Copy Control
171
Maximum Stored Pages
172
Auto Paper off
172
Mixed Size Originals - 2 Sided Copy
172
Fine-Tune 100%
172
Original Type - See - through Paper
172
Face Up/Down Output - Reverse Order
172
Face up / down - Auto (Single Sheet)
172
Auto Image Positioning - below 105 Gsm
173
Auto Image Positioning - above 106 Gsm
173
Comment Position
173
Date Position
173
Bates Stamp - Position
173
Annotations - Edit Comment
173
Bates Stamp - Edit Prefix 1 through 8
173
Maximum Number of Sets
173
Reading Order Options
173
Original Size Defaults
174
Original Size Defaults Options
174
A/B Series Size
174
Custom Size
174
Inch Size
174
Others
174
Reduce/Enlarge Buttons
174
Reduce/Enlarge Presets
175
Connectivity & Network Setup
177
Port Settings
177
Protocol Settings
178
Machine E-Mail Address/Host Name
178
Proxy Server Settings
178
Outgoing/E-Mail Settings
179
POP3 Server Settings
179
SMTP Server Settings
179
Remote Authentication Server Settings
179
Security Settings
179
Other Settings
179
Remote Authentication Server Settings
180
Kerberos Server Settings
180
SMB Server Settings
180
Security Settings
181
SSL/TLS Settings
181
S/MIME Settings
181
PDF/XPS Signature Settings
181
Ipsec Settings
181
Add Domain Name to User Name
182
Certificate Revocation Retrieval Settings
182
IEEE 802.1X Settings
182
Other Settings
182
FTP Server Login Name
183
FTP Server Password
183
Mailbox Backup Tool - IP Address
183
Original Type
185
Scan Service Settings
185
12 Scan Service Settings
185
Scan Defaults
185
File Format
186
Optimize PDF for Quick Web View
186
Thumbnail - Outgoing Email
186
Thumbnail - Scan to PC
186
Lighten/Darken
186
Contrast
186
Sharpness
187
Background Suppression
187
Shadow Suppression
187
Color Space
187
Original Orientation
187
Resolution
187
Mixed Size Originals
187
Edge Erase
187
Edge Erase - Top and Bottom Edges
187
Edge Erase - Left and Right
188
Quality/File Size
188
E-Mail Subject
188
Searchable Text
188
Language of the Original
188
Searchable - Text Compression
188
Transfer Protocol
188
Scan-To PC Defaults
188
Login Credential to Access Destination
189
User Name for FTP Scan
189
A/B Series Size
189
Inch Size
189
Others
189
Custom Size
189
Original Size Defaults
189
A/B Series Size
190
Inch Size
190
Others
190
Output Size Defaults
190
Reduce/Enlarge Presets
190
Preset%
191
Variable%
191
Preset Buttons - Edge Erase
191
Other Settings
191
Memory Full Procedure
191
Maximum Stored Pages
191
Saturation
192
Background Suppression Level
192
Shadow Suppression Level
192
TIFF Format
192
Image Transfer Screen
192
Searchable Page Orientation
192
Print Login Name on PDF Files
192
13 E-Mail Service Settings
193
Maximum Address Entries
193
Response to Read Receipts
193
E-Mail Service Settings
193
Read Receipts
194
Print Delivery Confirmation Mail
194
Split Send Method
194
Maximum Data Size Per Email
194
Maximum Total Data Size
194
Maximum Split Count
194
Allow Casual Users to Edit from Field
195
Allow Guest Users to Edit from Field
195
Allow to Edit from if Search Found
195
Allow to Edit from if Search Failed
195
E-Mail Sending When Search Failed
195
Edit E-Mail Receipts
196
Quantity/File Size for Retrieval
197
Pool Server
199
Pool Server Login Method
199
Job Flow Sheet List Default
199
16 Stored File Settings
201
Stored File Settings
201
Expiration Date for Files in Folder
201
Stored Job Expiration Date
202
Minimum Passcode Length for Stored Jobs
202
Print Order for All Selected Files
202
Network Controller Settings (System Settings)
203
Port Settings
203
Protocol Settings
203
Machine E-Mail Address/Host Name
204
Proxy Server Settings
204
Remote Authentication Server Settings
204
Security Settings
205
S/MIME Settings
205
Ipsec Settings
205
PDF/XPS Signature Settings
205
Certificate Revocation Retrieval Settings
206
IEEE 802.1X Settings
206
Other Settings
206
E-Mail Receive Protocol
206
Add Domain Name to User Name
207
FTP Server Login Name
207
FTP Server Password
207
Mailbox Backup Tool - IP Address
207
Setup and Calibration
209
SSL/TLS Settings
205
18 Setup and Calibration
209
Setup
209
Create Folder
209
Delete Folder Button
209
Check Mailbox Passcode
210
Delete Expired Files
210
Delete Files after Retrieval
210
Folder Name
210
Link Job Flow Sheet to Folder
210
Stored Programming
211
Storing a Program
211
When the Delete Folder Button Is Selected
211
Deleting Stored Programs
212
Calling a Stored Program
213
Naming/Renaming a Stored Program
213
Stored Program Icons
213
Create Job Flow Sheet
214
Restrictions on Using Job Flow
214
Create New Job Flow Sheet
215
Description
215
Keyword
215
Name
215
Send as E-Mail
215
Transfer Via FTP (1) Transfer Via FTP (2)
216
Transfer Via SMB (1) Transfer Via SMB (2)
216
Details
217
Create Job Flow Sheet Keyword
217
Add Address Book Entry
217
Address Type
218
Business Phone
218
E-Mail Address
218
Given Name
218
Name
218
Surname
218
Business Address
219
Office
219
Server Name/Ip Address
219
Shared Name (SMB Only)
219
Transfer Protocol
219
User Name
219
Paper Tray Attributes
220
Password
220
Port Number
220
When the Delete Entry Button Is Selected
220
Calibration
221
19 Overview of Accounting and Authentication/Security
223
Settings
223
Accounting Overview
223
Authentication/Security Settings Overview
224
Create/View/Edit a User Account
226
Resetting an Individual User Account
227
Accounting > Reset User Accounts
228
Resetting All User Accounts (Accounting)
228
System Administrator Meter (Copy Jobs)
229
Accounting > Accounting Type
229
Accounting > Auto Reset of User Billing Information
230
Selecting an Accounting Type
230
Copy Activity Report
231
21 Authentication/Security Settings
233
Types of Users
233
Authentication/Security Settings
233
Types of Authentication
234
System Administrator Settings
234
System Administrator Login ID
234
System Administrator Passcode
235
Authentication
235
Login Type
236
Selecting the Login Type
236
Access Control
236
Authentication > Create/View User Accounts
237
Create/View/Edit a User Account
237
Selecting the Access Control Options
237
Authentication > Reset User Accounts
239
Resetting All User Accounts (Authentication)
239
Resetting an Individual User Account
239
Create Authorization Groups
240
Creating/Editing an Authorization Group
240
User Details Setup
241
Maximum Login Attempts
242
Passcode Policy
242
Allow User to Disable Active Settings
243
Job Status Default
243
Active Jobs View
244
Overwrite Hard Disk (Optional)
244
Overwrite Hard Disk > Number of Overwrites
245
Overwrite Hard Disk > Schedule Image Overwrite
246
Authentication / Security
247
Advertisement
Xerox Color C75 Press User Manual (340 pages)
Brand:
Xerox
| Category:
Printer
| Size: 6.73 MB
Table of Contents
Table of Contents
3
1 Product Overview
11
Machine Components
11
Bypass (Tray 5)
12
Document Feeder
13
User Interface (UI)
14
Print Server Overview
15
Power On/Off
15
Two Power Switches
15
Power on
16
Power off
16
Energy Saver
16
Exiting the Energy Saver Mode
17
Locating the Machine Serial Number
17
Feeding and Finishing Devices
17
High Capacity Feeder (Tray 6), 1-Tray
18
Oversized High Capacity Feeder, 1 or 2-Trays
18
Advanced Finisher
19
Professional Finisher with Booklet Maker
20
Interface Module
20
GBC ® Advancedpunch
21
High Capacity Stacker
21
Standard/Booklet Maker Finisher
22
Squarefold ® Trimmer Module
23
2 Where to Find Help
25
Help on the World Wide Web
25
Print Server Customer Documentation
25
3 Submitting a Print Job
27
Printing from Your Computer
27
Printing from the Xerox Freeflow Print Server
27
Printing from the Xerox EX Print Server, Powered by EFI
28
4 Paper and Other Media
29
Loading Media in Trays 1, 2, and 3
29
Loading Paper in Trays 1, 2, and 3
29
Loading Tab Stock in Trays 1, 2, and 3
30
Loading Transparencies in Trays 1, 2, and 3
31
Loading Pre-Drilled Stock in Trays 1, 2, and 3
32
Loading Media in the Bypass Tray
33
Loading Paper in the Bypass Tray (Tray 5)
33
Loading Tab Stock in the Bypass Tray (Tray 5)
34
Loading Transparencies in the Bypass Tray (Tray 5)
35
Loading Pre-Drilled Stock in the Bypass Tray (Tray 5)
37
Loading Media in Optional Feeding Devices
38
Loading Post-Process Media in Optional Finishing Devices
38
Loading Tab Stock with the GBC Advancedpunch
38
5 Copy
39
Basic Copy Using the Document Feeder
39
Basic Copy Using the Document Glass
40
Copy Tab
41
Reduce/Enlarge
41
Reduce/Enlarge more Options
42
Paper Supply
42
Output Color
43
Copy Output
43
Sided Copying
44
Original Type
45
Lighten/Darken
46
Image Quality Tab
46
Image Options
46
Image Enhancement
47
Color Effects
47
Color Balance
48
Color Shift
48
Layout Adjustment Tab
48
Book Copying
48
Sided Book Copying
48
Book Copying
49
Sided Book Copying
50
Original Size
50
Edge Erase
50
Image Shift
51
Image Rotation
51
Invert Image
52
Original Orientation
53
Output Format Tab
54
Booklet Creation
54
Covers
56
Transparency Options
60
Page Layout
60
Poster
62
Annotations
62
Watermark
63
Tab Margin Shift
63
Face Up/Down Output
64
Folding (Optional)
64
ID Card Copy
66
Job Assembly Tab
67
Build Job
67
Sample Job
68
Combine Original Sets
68
Delete Outside/Delete Inside
69
6 Scan
71
Basic Scanning Procedure
71
Scan Options
72
Basic Scan Options
72
Additional Scan Options
73
Advanced Settings
74
Layout Adjustment
75
Filing Options
77
E-Mail Options
78
E-Mail
81
E-Mail Components
81
Scanning to an E-Mail Address
82
Network Scanning
83
Network Scanning Components
83
Network Scanning Procedure
84
Scan to PC
86
Scan to PC Components
86
Using the Scan to PC Feature
86
Store to Folder
87
Store to Folder Components
87
Save Using the USB Memory Device (Optional)
88
Store to USB Components
88
Store to USB Procedure
89
Web Services for Devices (WSD)
89
Store to WSD Component
89
Store to WSD Procedure
89
7 Job Status
91
Job Status Overview
91
Active Jobs Tab
91
Completed Jobs Tab
91
8 Machine Status
93
Machine Information Tab
93
Faults Tab
95
Supplies Tab
95
Billing Information Tab
95
Accessing Billing Information
95
Billing Meters/Usage Counters
96
Usage Counters
96
User Account Billing Information
97
Tools Tab
97
Changing the Paper Tray Attributes
98
Gloss Mode
98
9 Maintenance
99
Cleaning the Machine
99
Cleaning the Exterior
100
Cleaning the Document Cover and Glass
100
Cleaning the Document Feeder Rollers
103
Replacing Consumable Supplies
104
Ordering Supplies
104
Checking the Status of Crus
105
Replacing a Toner Cartridge
106
Replacing the Toner Waste Bottle
108
Replacing a Drum Cartridge
109
Replacing the Fuser
115
10 Problem Solving
121
Paper Jams
121
Document Feeder Jams
121
Document Jams under the Document Feeder Belt
124
Lower Left Cover Jams
126
Main Unit Jams
127
Paper Jams in Trays 1-3
129
Paper Jams in the Bypass (Tray 5)
131
Envelope Jams in the Bypass Tray
132
Inverter Jams (Bottom Right Cover)
132
Fault Codes
134
General Problems
149
Other Faults
151
Image Quality
151
Hints and Tips
157
Fuser Hints and Tips
157
Extending Fuser Life
157
Preventing Fuser Jams
157
Preventing Fuser Damage
158
Fuser Width Switch Information
159
Miscellaneous Hints and Tips
161
11 Specifications
163
Print Engine Specifications
163
Additional Optional Accessories
164
12 High Capacity Feeder (1-Tray Hcf/Tray 6)
165
HCF (Tray 6) Overview
165
Loading Paper in the HCF (Tray 6)
165
Problem Solving
167
Clearing Paper Jams in Tray 6 (1-Tray HCF)
167
HCF (Tray 6) and Lower Left Cover Jams
168
HCF (1 Tray) Fault Codes
170
13 Oversized High Capacity Feeder (OHCF), 1 or 2 Trays (Trays 6/7)
177
Loading Media in the 1 or 2-Tray OHCF
178
Loading Paper in the OHCF (1 or 2 Trays)
178
Loading Tabs in the OHCF (1 or 2 Trays)
178
Loading Transparencies in the OHCF (1 or 2 Trays)
179
Print Jobs
180
Loading Pre-Drilled Stock into the OHCF (1 or 2 Trays) for 1-Sided Print Jobs
180
Print Jobs
181
Loading Pre-Drilled Stock into the OHCF (1 or 2 Trays) for 2-Sided Print Jobs
181
Skew Adjustment Levers
183
Maintenance
184
Replacing the OHCF Feed Rolls
184
Replacing the (OHCF) Bypass Tray Feed Rolls
187
OHCF Problem Solving
189
Clearing OHCF Jams
189
Paper Jams Inside the OHCF Trays
190
OHCF Paper Jams at Lever 1A and Knob 1C
191
OHCF Paper Jams at Lever 1B and Knob 1C
192
OHCF Paper Jams at Lever 1D and Knob 1C
193
OHCF Fault Codes
195
OHCF (Trays 6/7) Specifications
203
14 Advanced/Professional Finishers
205
Advanced Finisher
205
Professional Finisher with Booklet Maker
206
Loading Staples for the Advanced/Professional Finishers
206
Staple Jam
207
Ordering Supplies
207
Finishing Problems
208
15 Interface Module
209
Overview
209
Control Panel
210
Paper Path
211
Paper Curl Settings on the Interface Module
211
Preset Decurler Settings
211
Manual Decurler Buttons
212
Problem Solving
212
Clearing Jams
212
Paper Jams at Lever 1A
212
Paper Jams at Lever 2A
214
Paper Jams at Lever 2B
215
Fault Codes
216
16 High Capacity Stacker (HCS)
223
Overview
223
Identifying the Components
224
Control Panel
225
HCS Top Tray
225
Unloading the Stacker Tray
226
Problem Solving
227
Jam Clearance
227
HCS Entrance Jams (E1, E2, and E3)
227
HCS Transport Jams (E4, E5, and E6)
228
HCS Top Tray Jam (E7)
230
HCS Exit Jam (E8)
231
Hints and Tips for Using the HCS
232
Loss of Power
232
Fault Codes
233
Specifications
248
17 Standard/Booklet Maker Finisher
249
Manual Decurling Feature on the Finisher
251
Folding Feature
252
Fold Types
252
Loading Paper/Tabs in Tray 8/T1 (Post-Process Inserter)
254
Maintenance
255
Standard/Booklet Maker Consumable Supplies
255
Replace the Standard Staple Cartridge
256
Replace the Booklet Staple Cartridge
257
Replacing the Staple Waste Container on the Finisher
259
Empty the Punch Waste Container
261
Finisher Problem Solving
262
Paper Jams in Tray 8/T1 (Post-Process Inserter)
263
Paper Jams at Lever 1A and Knob 1C
264
Paper Jams at Lever 1D
265
Paper Jams at Lever 1B
266
Paper Jams at Lever 3B and 3D
267
Paper Jams at Lever 3E and Knob 3C
269
Paper Jams at Lever 3G and Knob 3F
270
Paper Jams at Lever 4B and Knob 3A
271
Paper Jams at Lever 2A and Knob 3A
272
Paper Jams at Lever 2B and Knob 2C
273
Paper Jams at 2C, 2E, 2F, and 2D
275
Paper Jams at 2D and Lever 2G
276
Paper Jams at Unit 4 and Knob 4A
277
Paper Jams at Finisher Top Tray
279
Paper Jams at Finisher Stacker Tray
280
Paper Jams at the Optional Booklet Maker Tray
281
Stapler Faults
282
Staple Jams in the Standard Staple Cartridge
283
Staple Jams in the Booklet Maker Cartridge
284
Reinserting the Standard Staple Cartridge
286
Fault Codes
288
Specifications
300
Standard/Booklet Maker Finisher
300
Optional C/Z Folder
303
Xerox Color C75 Press Quick Start Manual (26 pages)
Brand:
Xerox
| Category:
Printer
| Size: 0.44 MB
Table of Contents
Quick Start Guide
1
Table of Contents
3
1 Product Overview
5
User Interface (UI)
6
Power On/Off
7
Two Power Switches
7
Power on
7
Power off
8
2 Copy
9
Basic Copy Using the Document Feeder
9
Basic Copy Using the Document Glass
10
3 Where to Find Help
13
Help on the World Wide Web
13
Print Server Customer Documentation
13
4 Paper and Other Media
15
Loading Paper in Trays 1, 2, and 3
15
Loading Paper in the Bypass Tray (Tray 5)
16
5 Replacing Consumable Supplies
19
Ordering Supplies
19
Replacing a Toner Cartridge
20
Advertisement
Xerox Color C75 Press Specification (12 pages)
Xerox Color C75 Press
Brand:
Xerox
| Category:
Printer
| Size: 2.62 MB
Advertisement
Related Products
Xerox ApeosPort-III C7600
Xerox Color C70 Series
Xerox versalink C7020
Xerox versalink C7025
Xerox versalink C7030
Xerox VersaLink C70XX
Xerox VersaLink C71 Series
Xerox VersaLink C7120
Xerox VersaLink C7125
Xerox VersaLink C7130
Xerox Categories
Printer
All in One Printer
Copier
Printer Accessories
Scanner
More Xerox Manuals
Login
Sign In
OR
Sign in with Facebook
Sign in with Google
Upload manual
Upload from disk
Upload from URL